
I’m adding a fly front (concealed button placket) to the Lennox Boilersuit by Homer + Howells but this technique can be used for any button down shirt, dress or jumpsuit.
A fly front or concealed button placket / buttonstand is where the buttonholes are hidden behind an extra fold of fabric so when the garment is fastened, the buttons are out of view, as shown here.
You can find out more about my Lennox Boilersuit project in my other post.
The original buttonstand on the front bodice pattern is constructed by folding under the edge of fabric twice to conceal the raw edge. This provides a sturdy layer of fabric and interfacing to hold the buttons and buttonholes.
To create the fly front I need to add an extra section to the original buttonstand which will be where the new buttonholes will be formed.
Adding a Fly Front
I’ve created a video showing how to adapt the front bodice pattern to add the concealed button stand, including details on how to construct this in fabric.
I’ve also written a tutorial which you’ll find below the video.
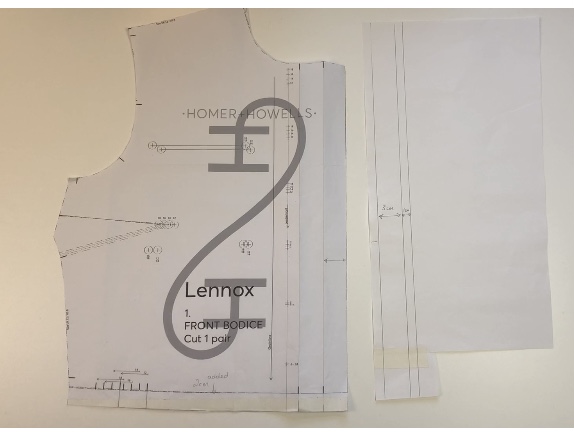
Adapting the pattern is quite easy. You just need to add the width of the button stand plus an additional seam allowance to the edge of the front bodice pattern piece as follows:
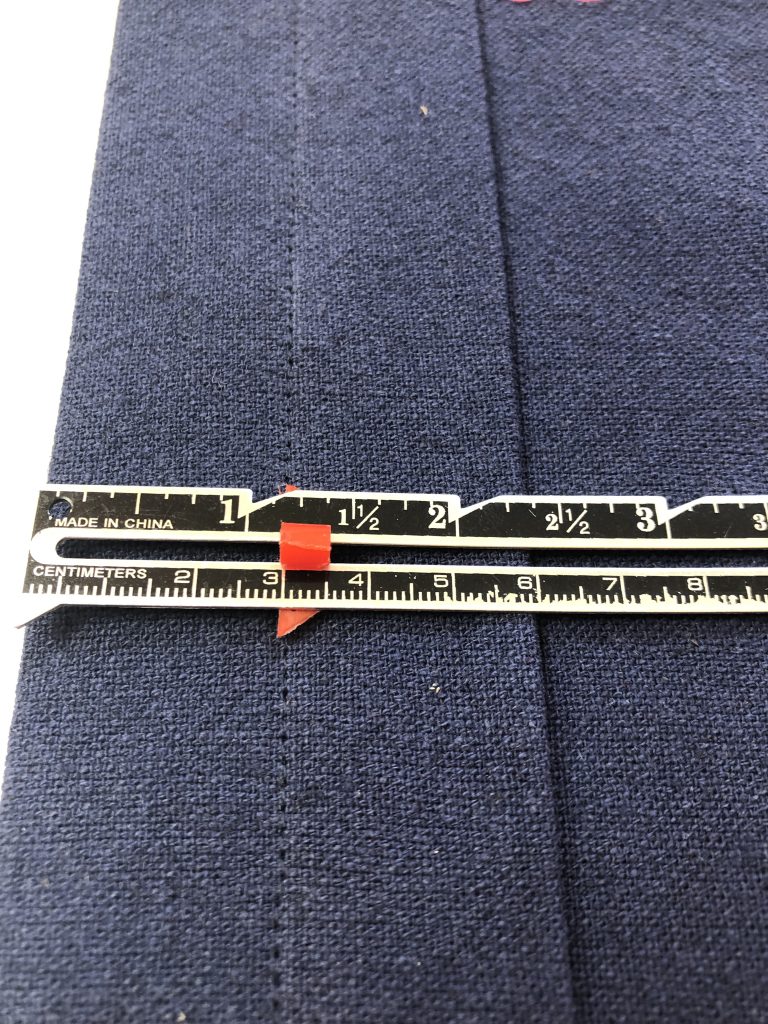
1. Measure the button stand – On the Lenox Boilersuit this is 3cm.
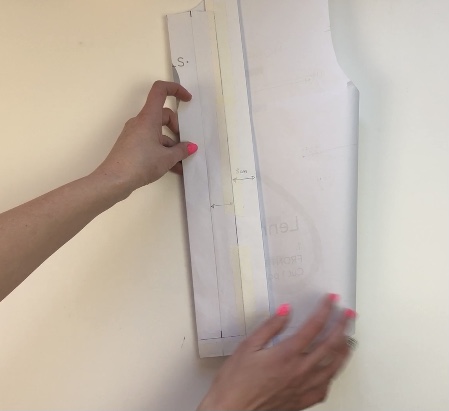
2. On a separate piece of paper draw a line 1cm from the edge. (This is the space for sticking the paper to the pattern.) Make sure your piece of paper is slightly longer than the pattern piece you are attaching it to.
3. Draw a second line 3cm (or the width of the button stand) away from the first line. (This will create the additional concealed button stand)
4. Draw another line 1cm (or the width of the seam allowance) away from the second line. (This will create the seam allowance on the concealed button stand.)
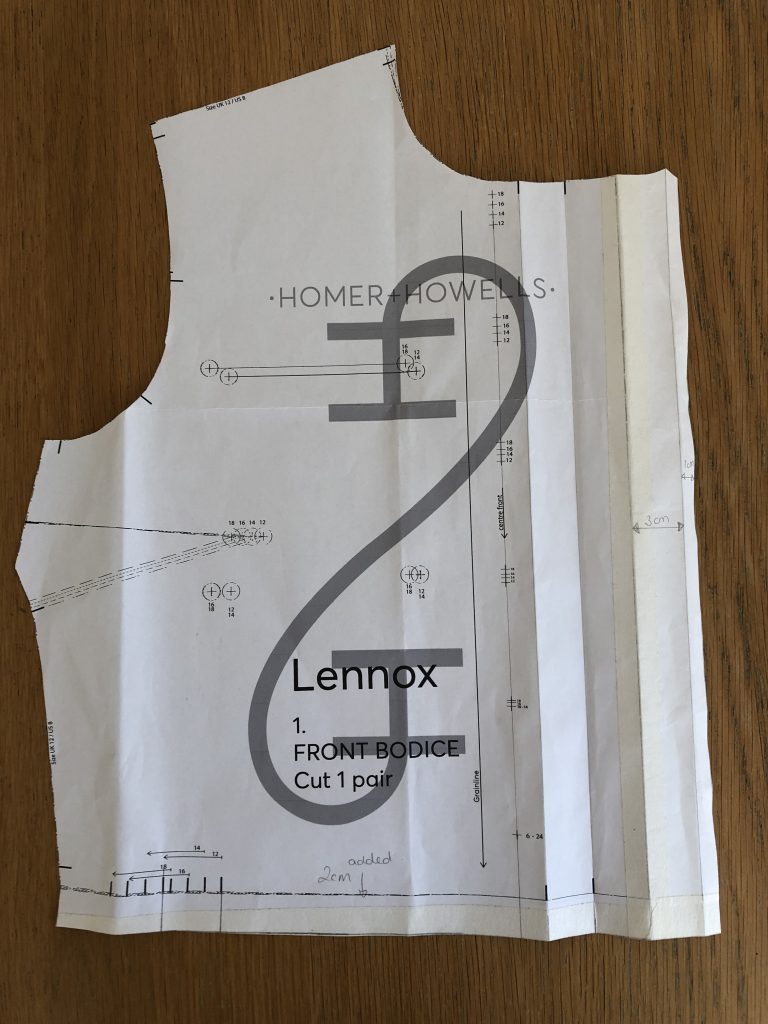
I’ve added 2cm to the bottom edge of the pattern to lengthen this for my personal measurements – you don’t need to do this but it is shown in the following images.
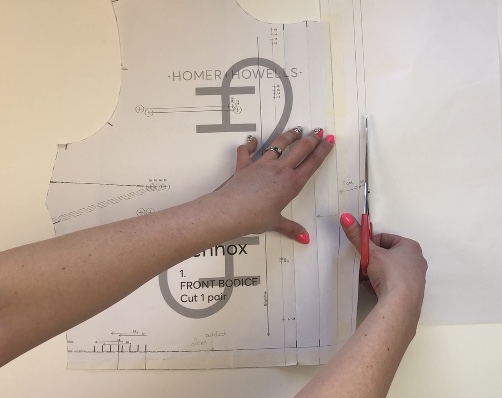
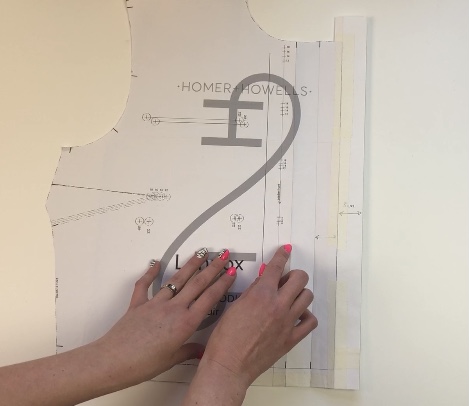
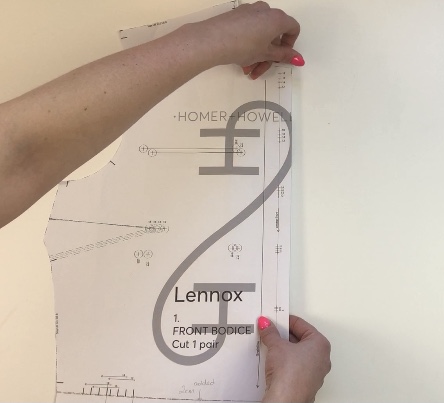
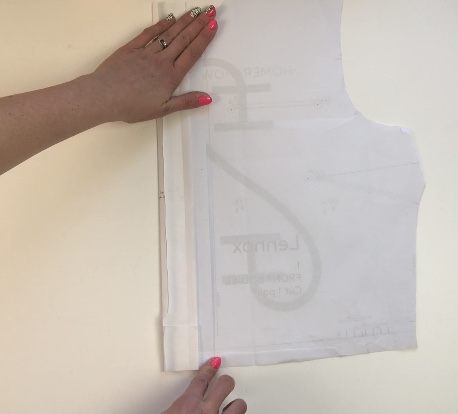
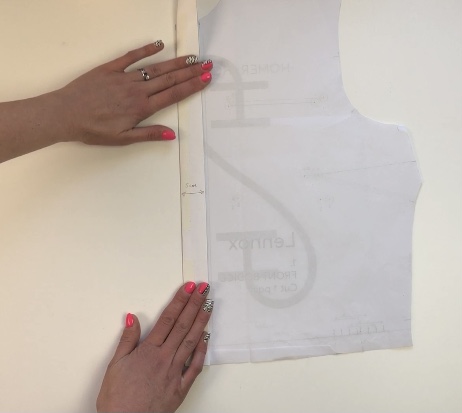
5. Attach the front bodice pattern piece to the additional piece of paper, matching the edge of the button stand to the first line on the paper.
I’ve used masking tape to attach the pattern.

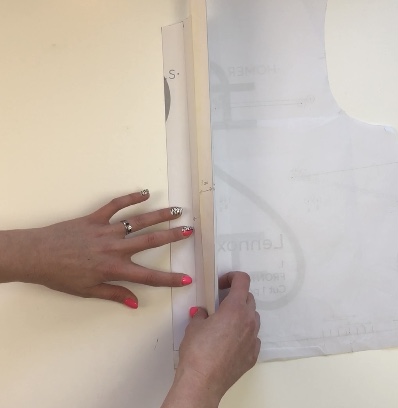
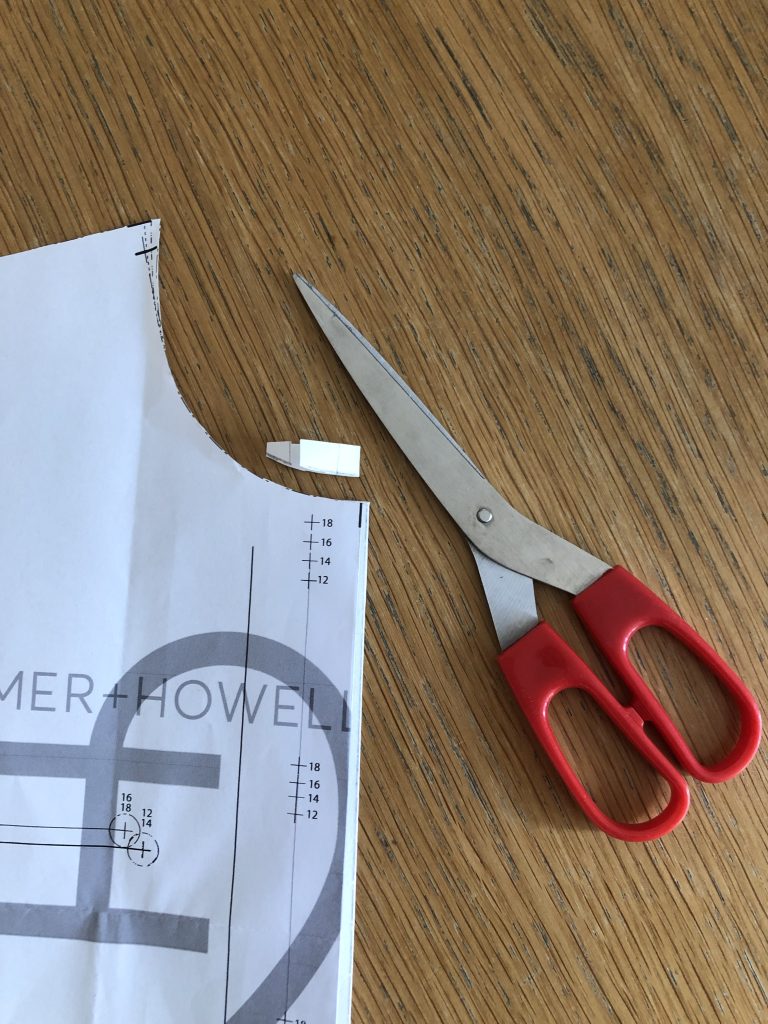
6. Trim off the excess paper
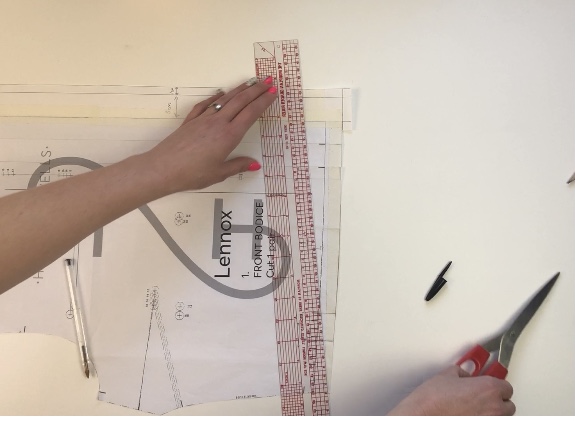
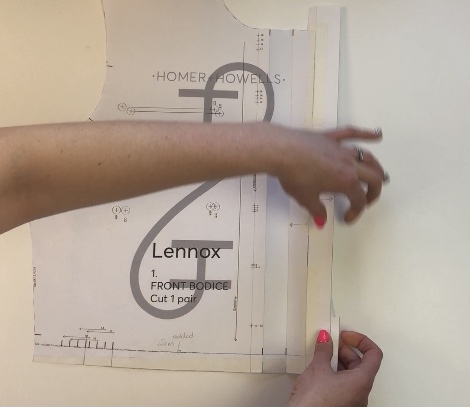
7. True up the lower edge of the pattern: Draw a line across the bottom edge, flush with the original pattern piece. Trim off excess paper.
8. True up the top edge by first folding the paper as you would when constructing with the fabric:
a) Fold the 1cm seam allowance to the wrong side.
b) Fold along the first line next to the centre front marking, folding the paper to the wrong side.
c) Fold along the second line from the centre front, folding the paper right sides together.
d) Fold along the line which joins the extra paper to the original pattern, folding the wrong side of the paper together.
e) From the right side, at the top edge, draw a line along the excess paper flush with the neckline.
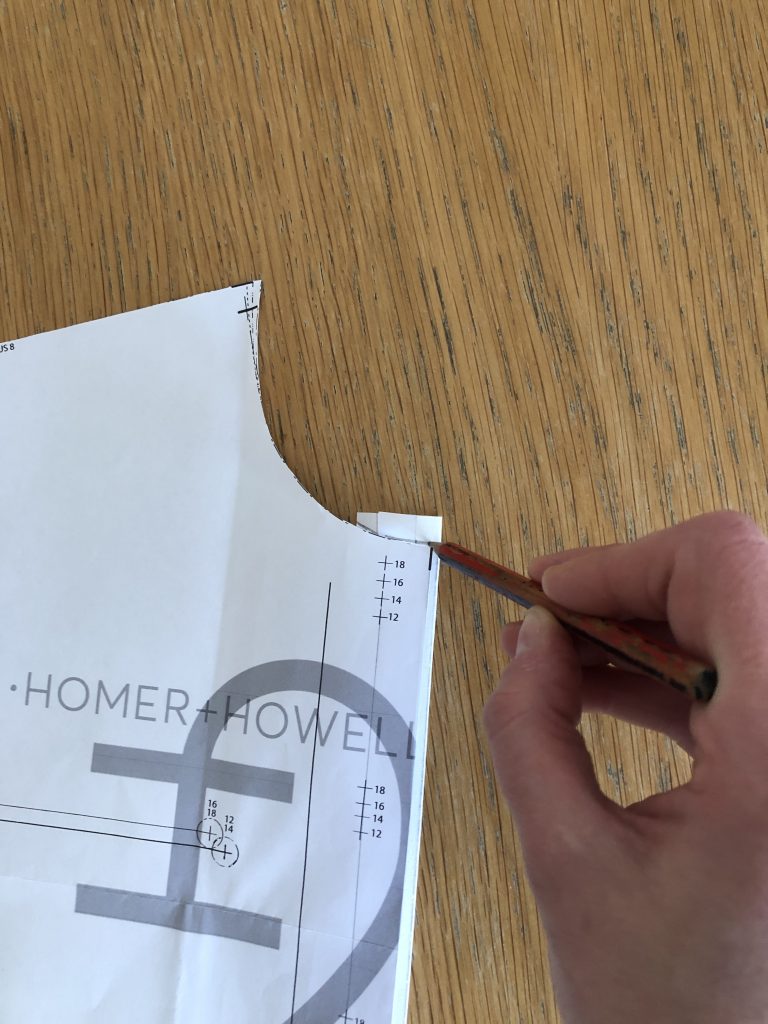
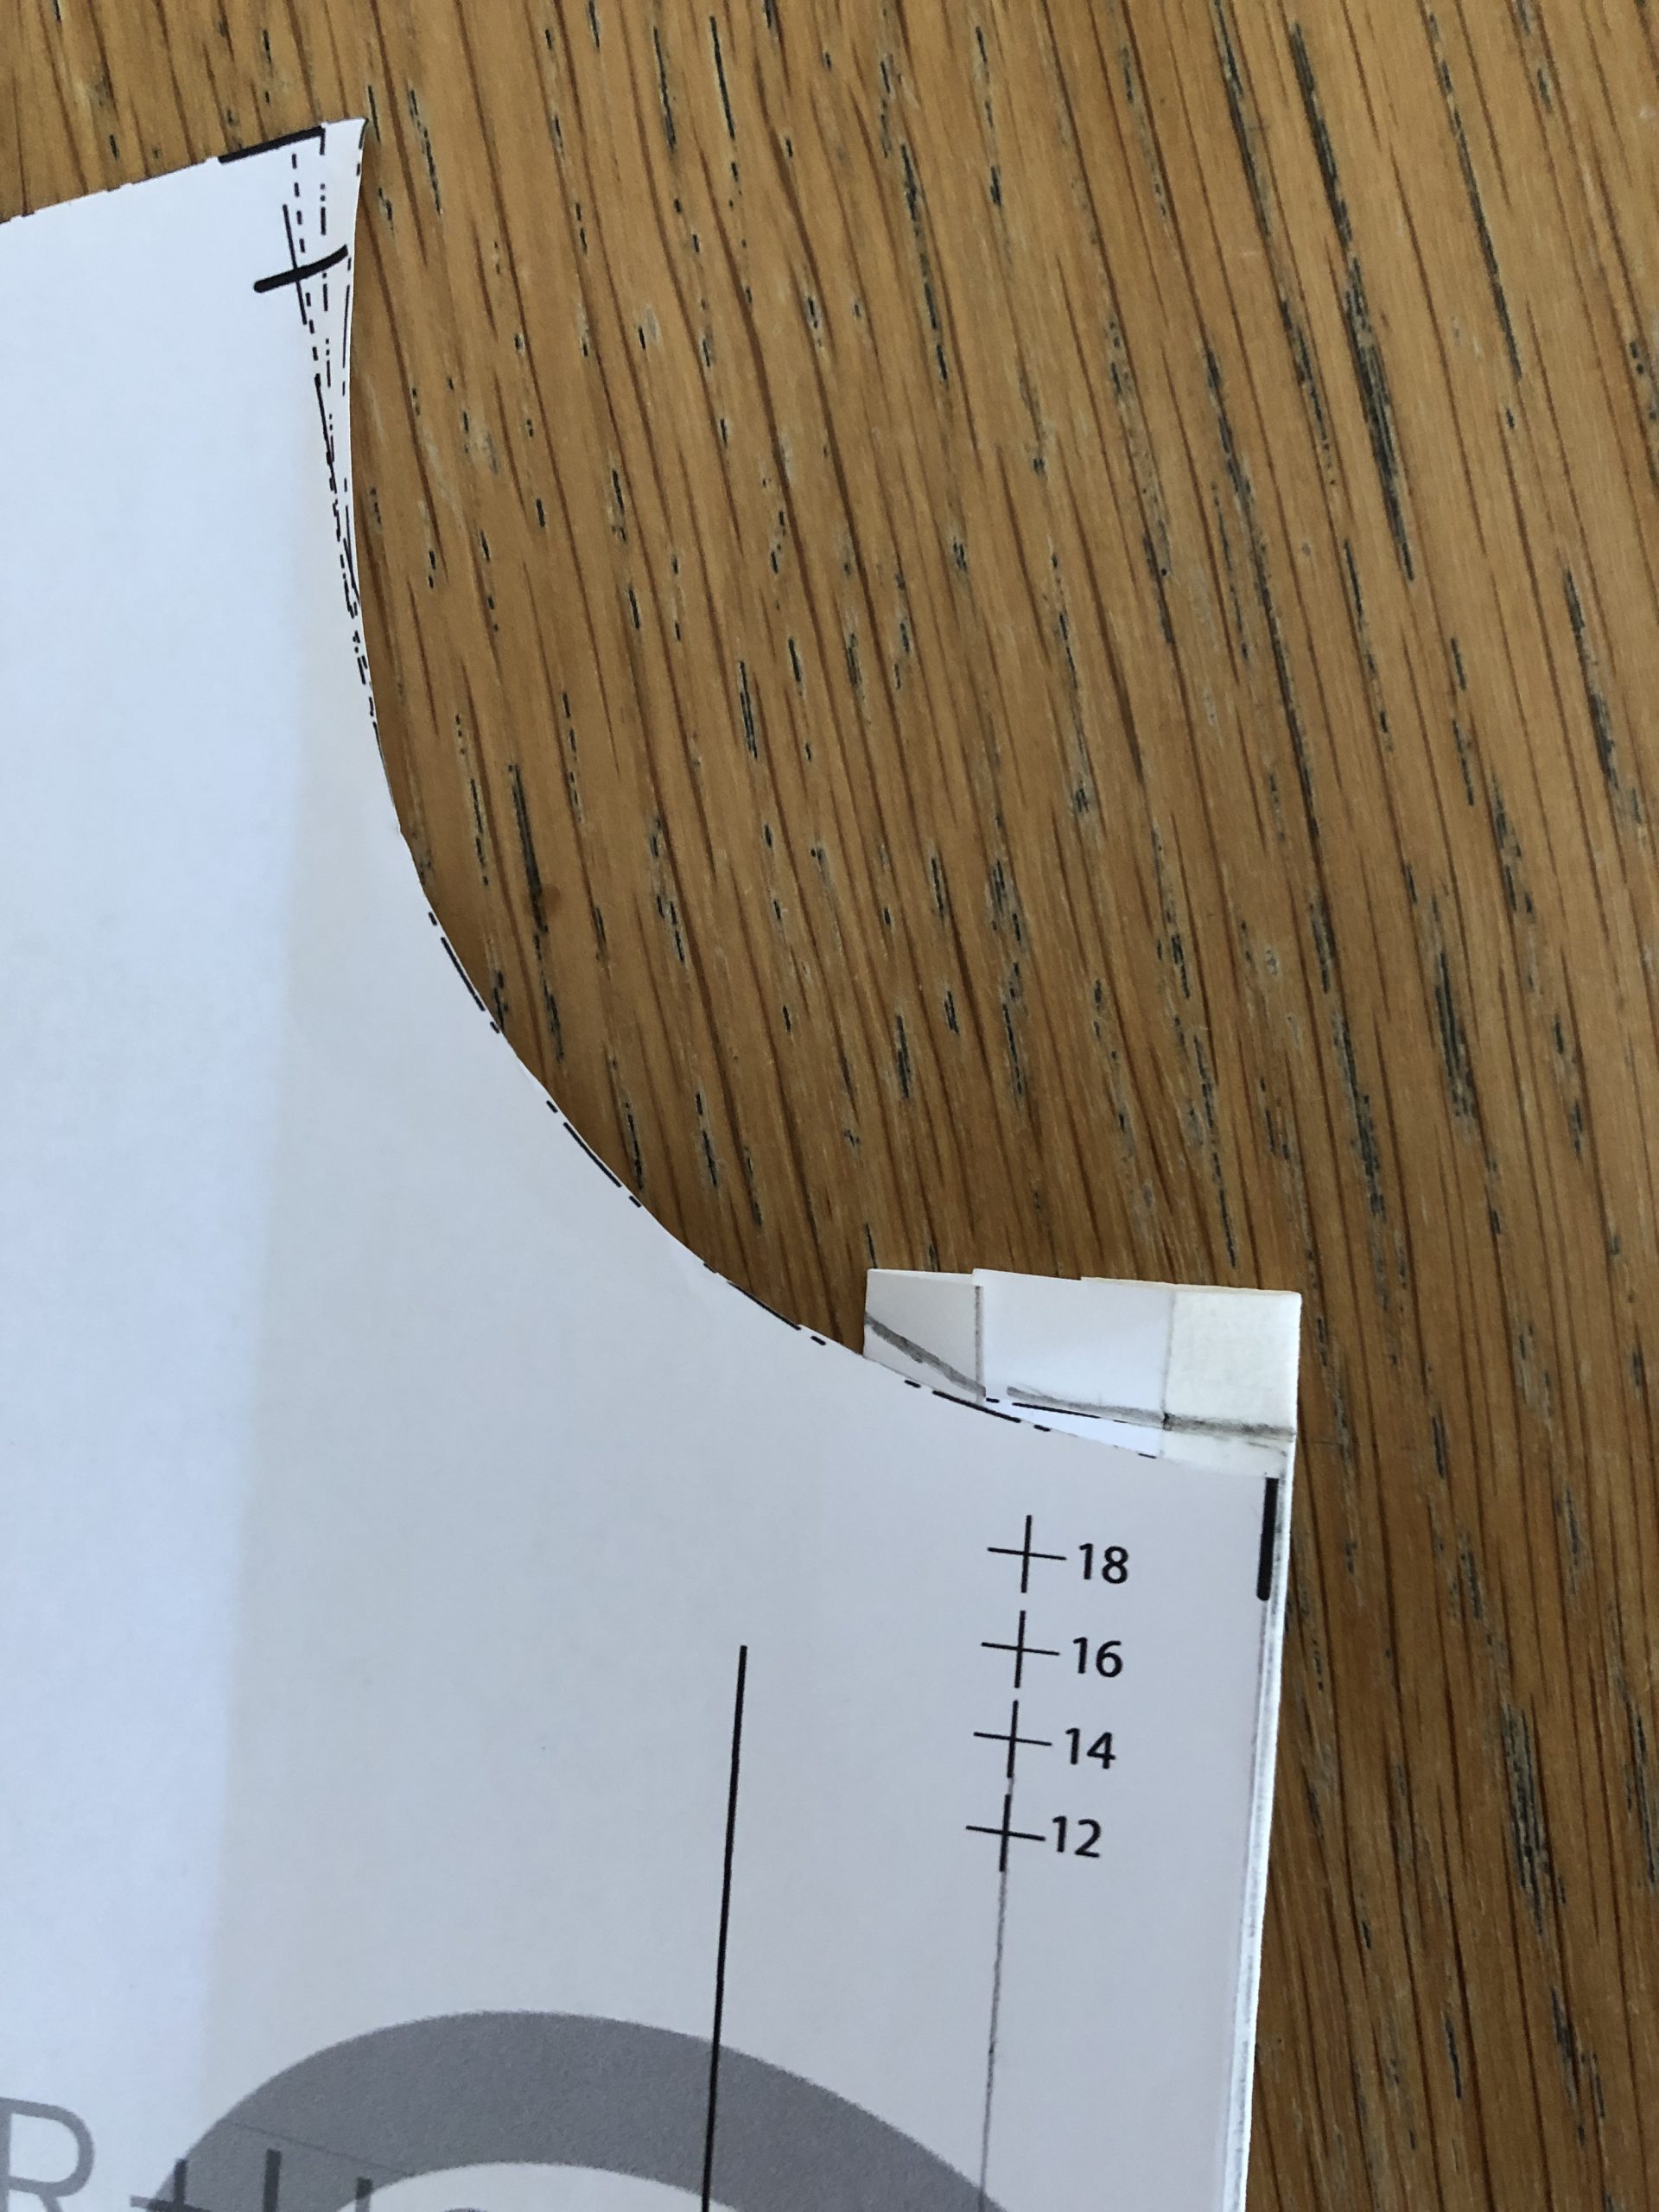
f) Cut along this line, cutting off the excess paper.
g) Open out the paper pattern.
Cutting out the Pattern
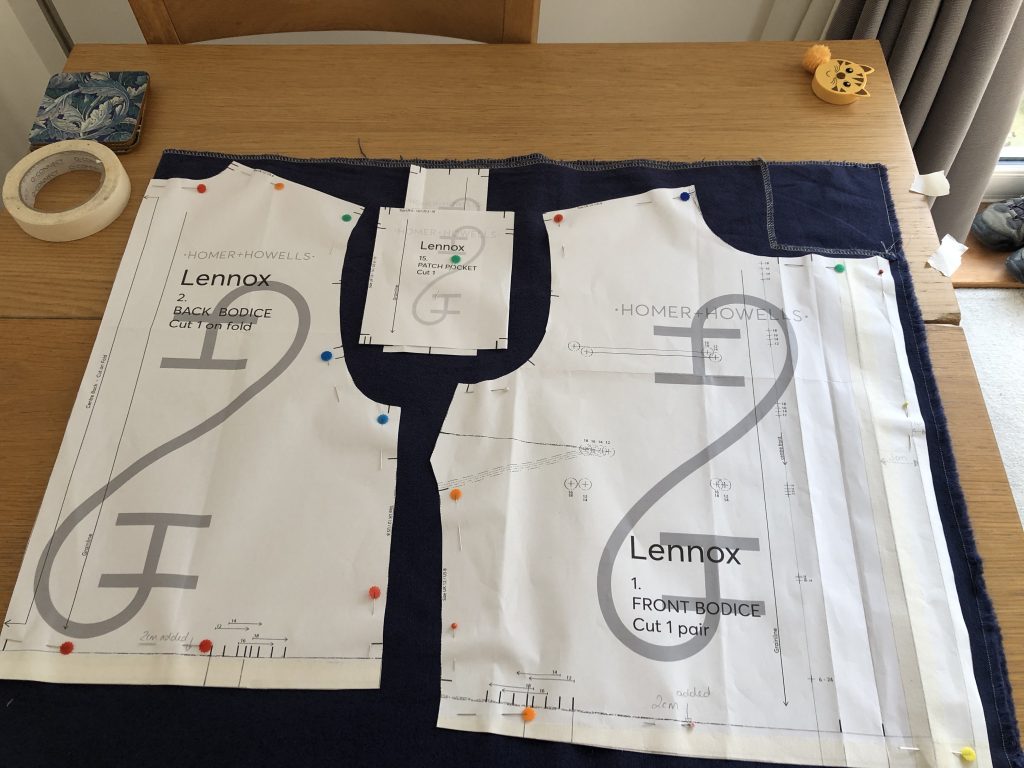
The pattern layout for the Lennox Boilersuit shows the fabric as one single layer and the pattern pieces cut one at a time.
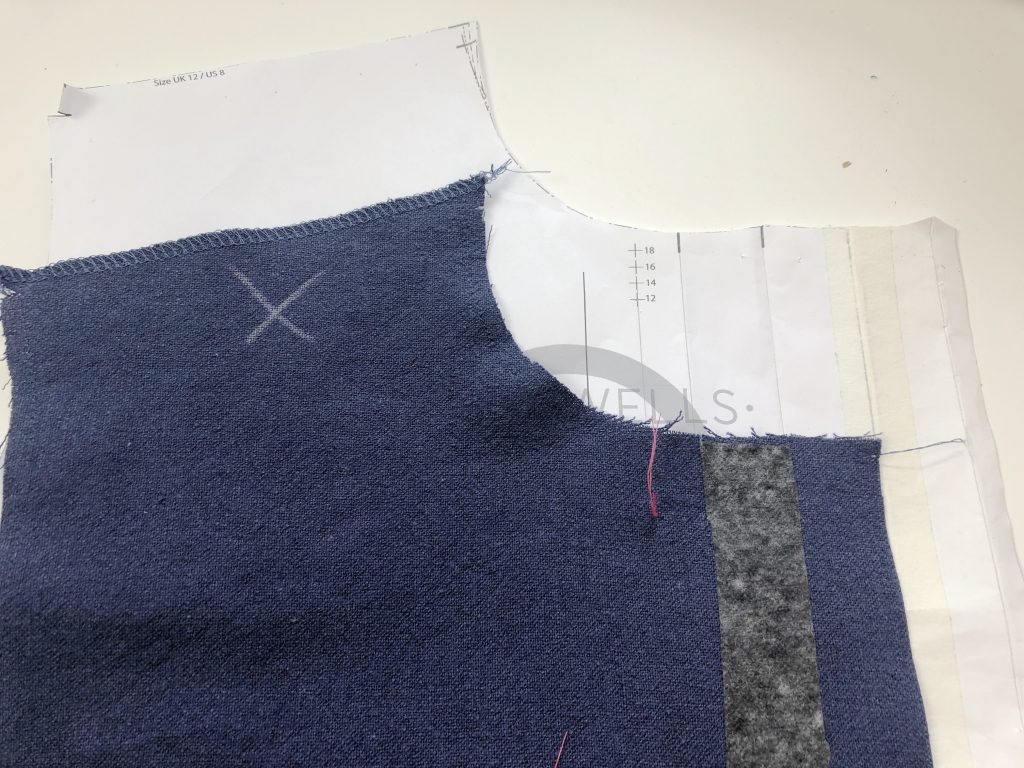
I chose not to do this and folded the fabric right sides together, placed the back bodice piece on the fold and then cut out the front bodice so I had 2 pieces which both include the additional fly front buttonstand section.
You can see the patch pocket and fly section pattern pieces pinned to the gap on the fabric but I cut each through a single layer of fabric – I was just making sure I’d fit all the pieces onto my layout before cutting anything out.
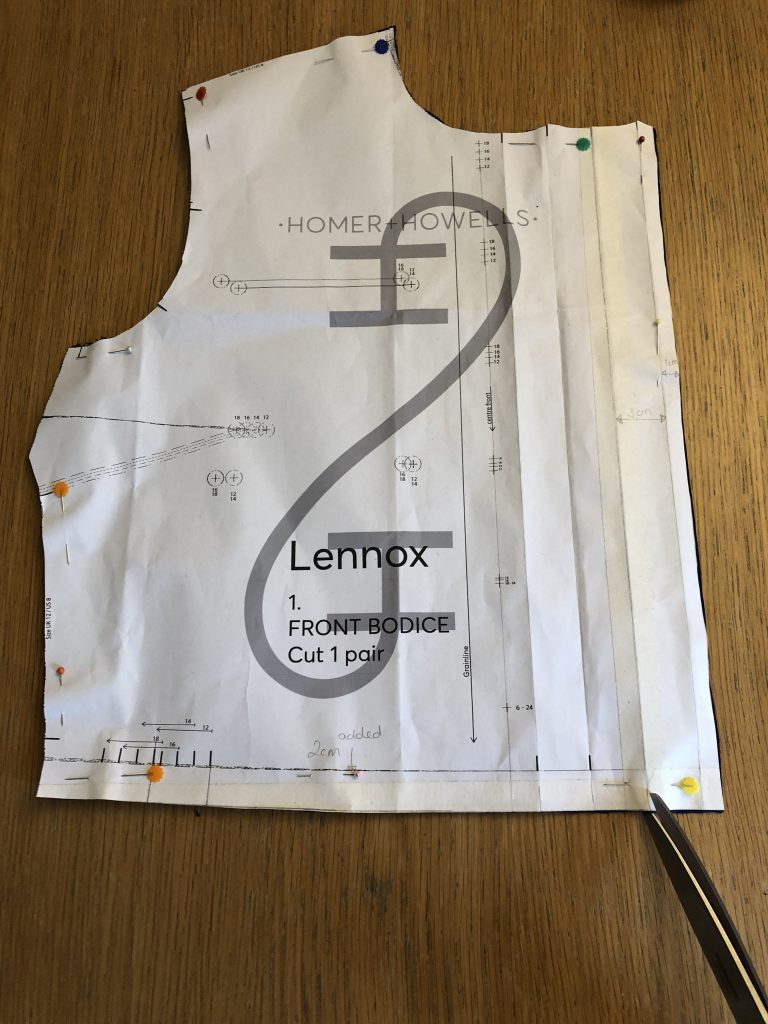
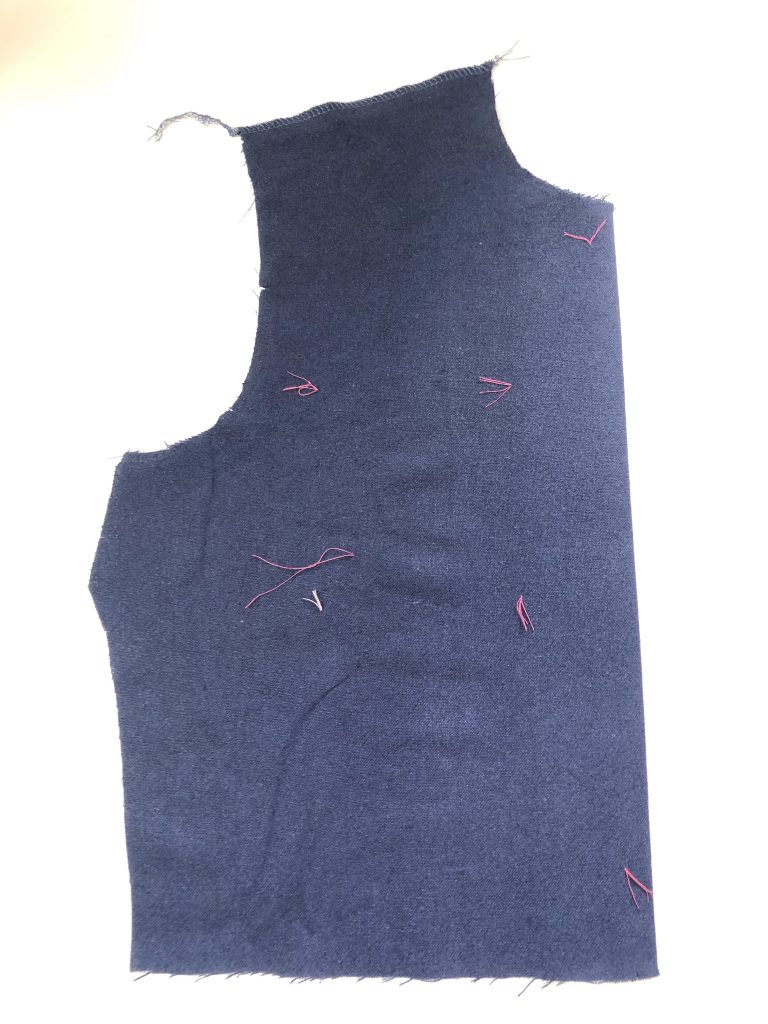
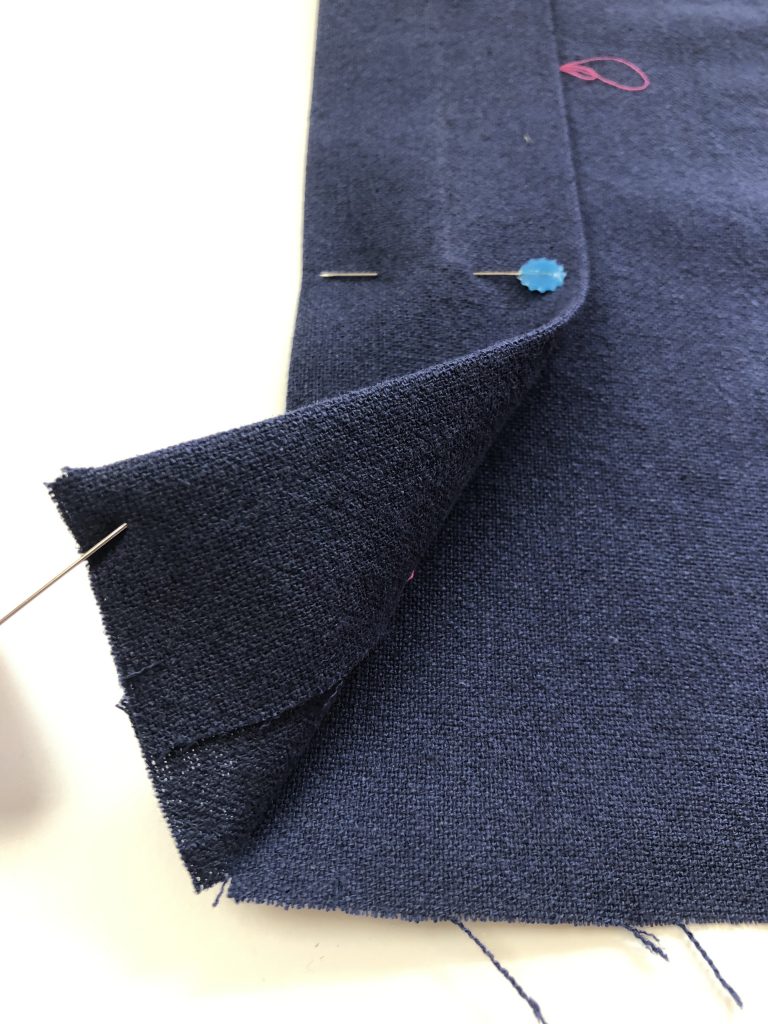
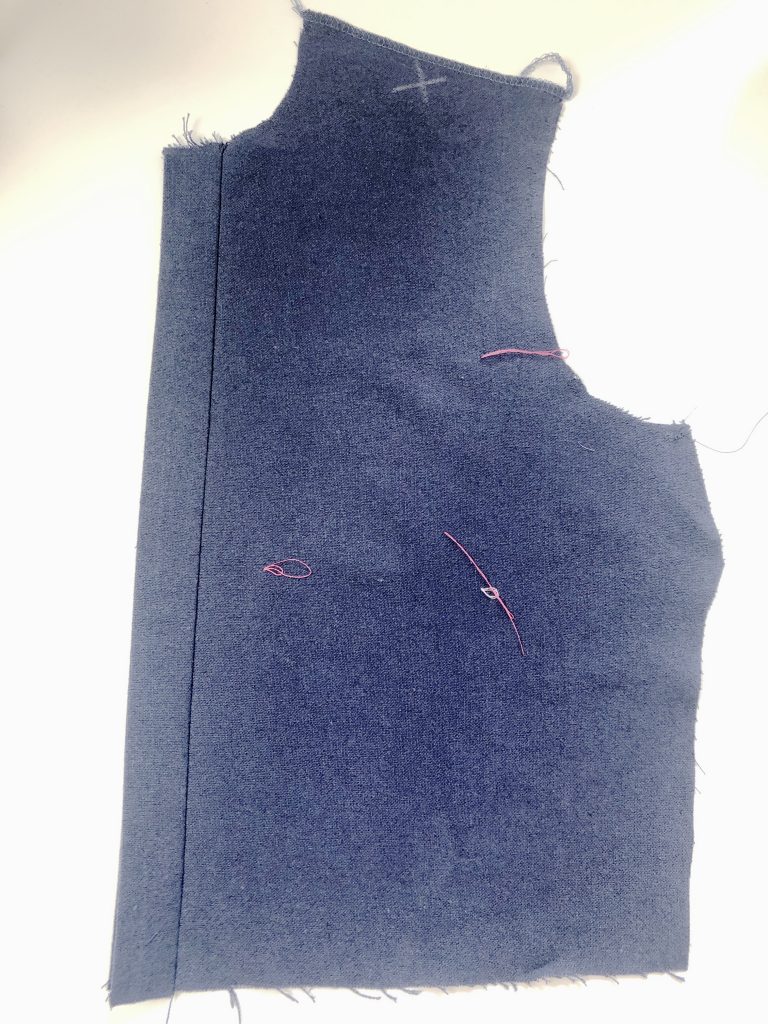
After cutting out I could make sure that I marked up the pattern pieces using tailor’s tacks to mark the tip of the dart and the placement for the pocket. I also snipped 5mm into the seam allowance at the top and bottom of each of the fold lines.
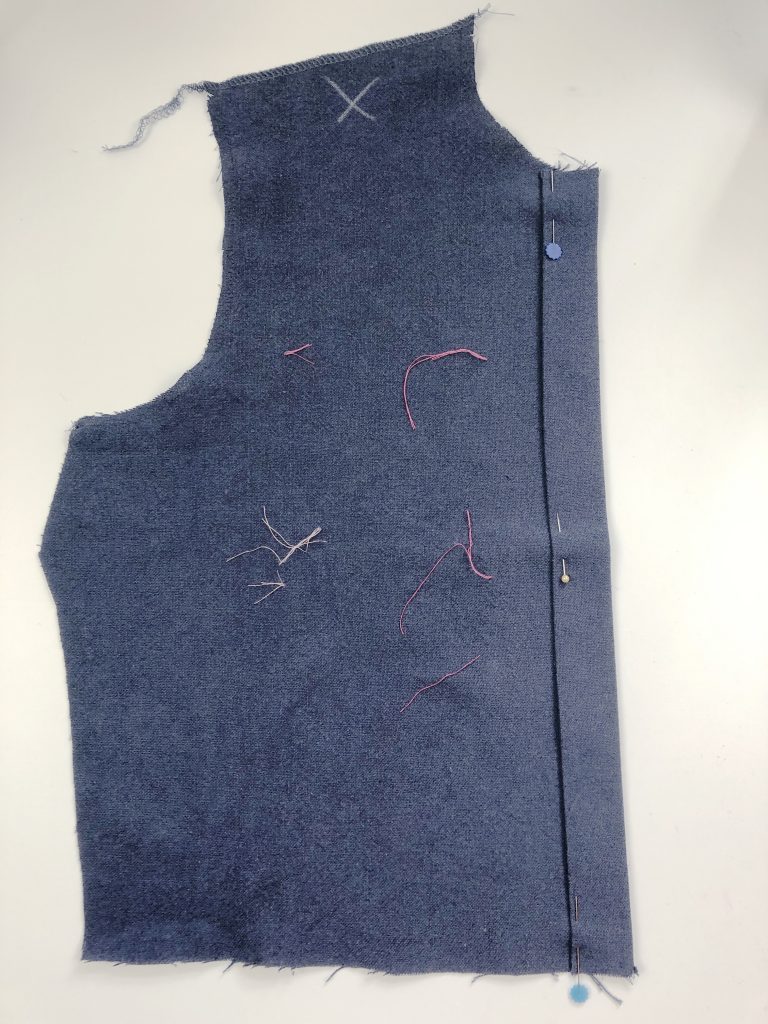
The extra fabric I’ve added to create the fly front is only needed on one side of the front bodice – the one which will hold the buttonholes. In this case (for a female fastening) it sits on the right side of the front bodice.
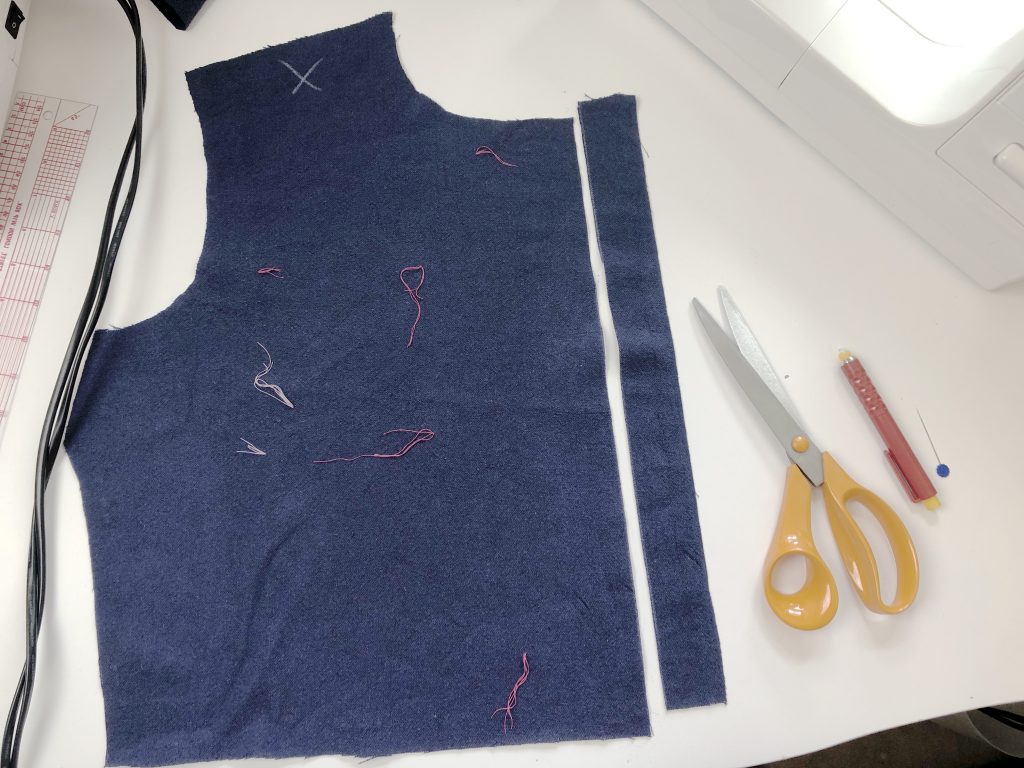
The extra fabric can be removed from the left front bodice.
I marked a line in chalk on the wrong side of the left front and trimmed off the extra section (3cm buttonstand plus 1cm seam allowance).
I’ve included more details on cutting out the pattern and making up the garment on the main Lennox Boilersuit post.
Interfacing the Buttonstands
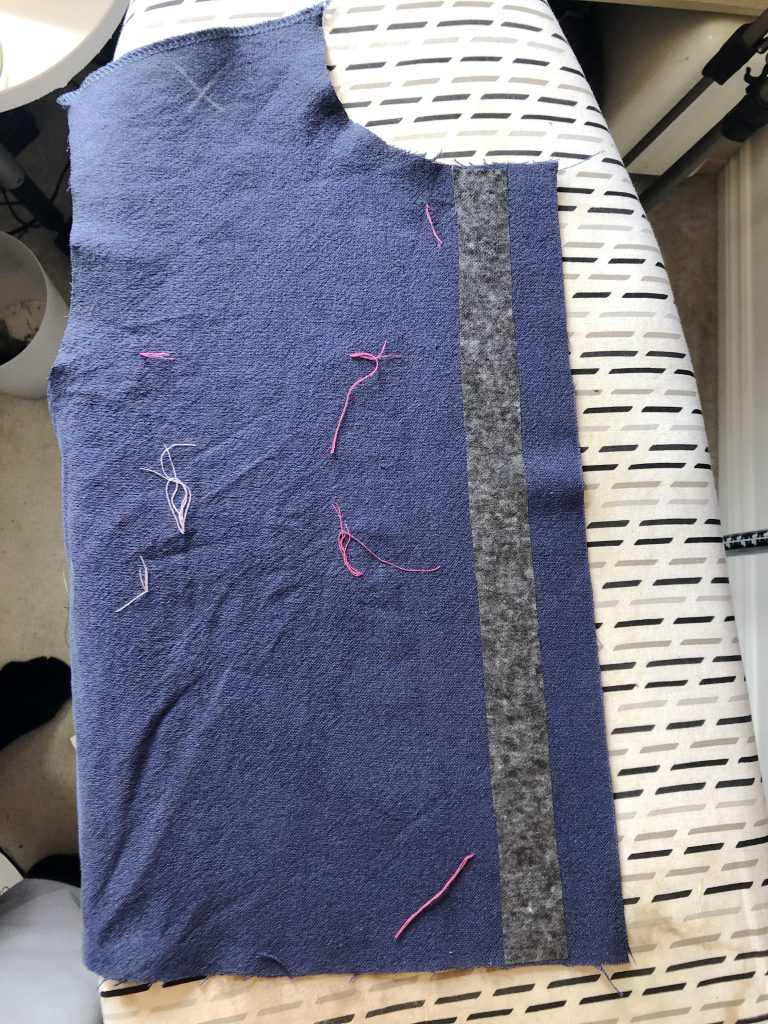
The pattern instructions suggest adding interfacing to the right shirt front only but I think that the left side, where the buttons will be sewn, also needs to be interfaced to provide additional strength and sturdiness to the fabric and better support the weight of the buttons. I placed a strip of interfacing 3cm wide to cover one section of the buttonstand on each of the front bodice pieces.
On the left bodice front the strip of interfacing sits 3cm from the raw edge, on the wrong side of the fabric, as shown below.
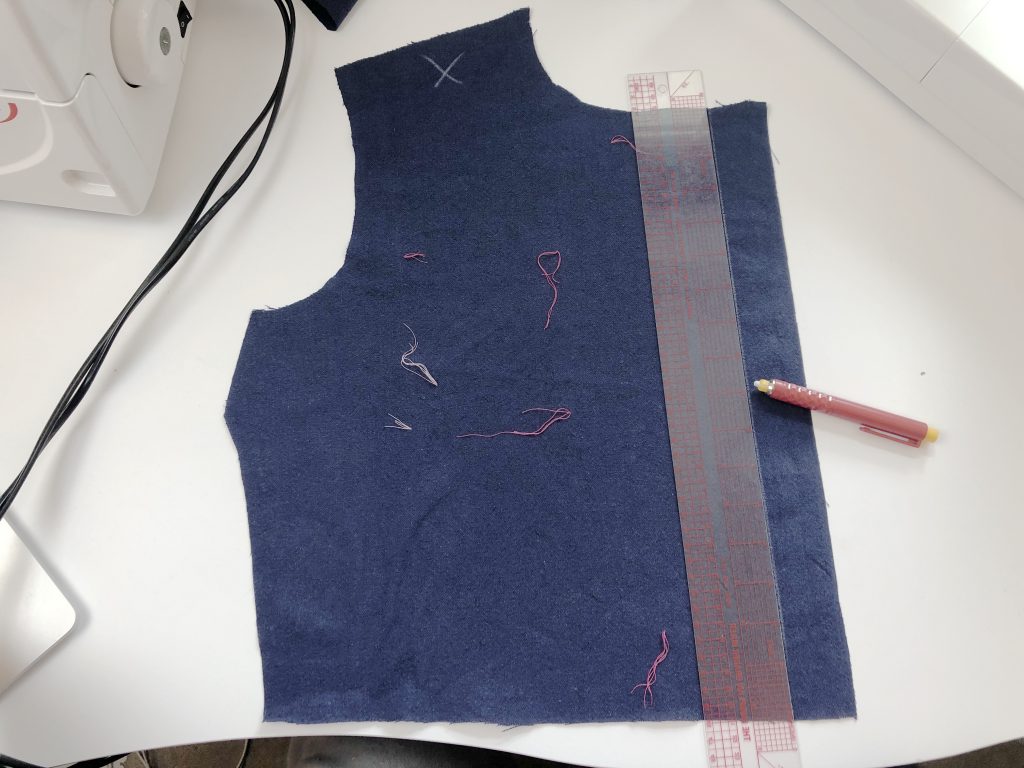
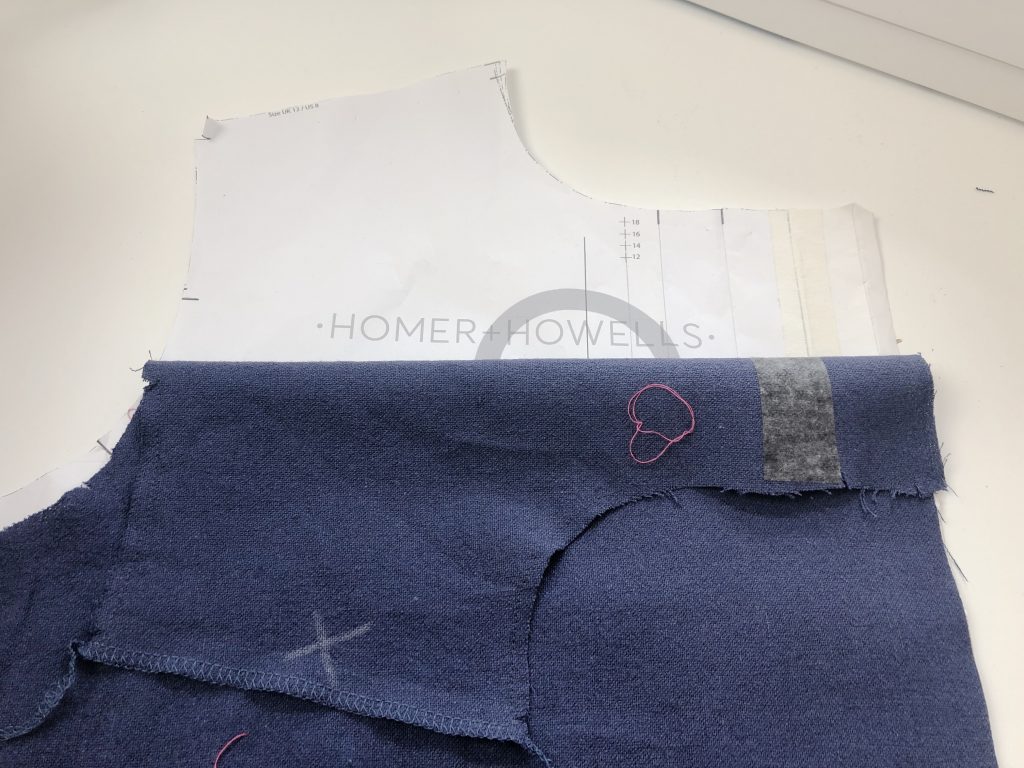
On the right front, the strip of interfacing sits 4cm from the raw edge, on the wrong side of the fabric, as shown below.

Constructing the Fly Front
The left bodice front is constructed according to the main instructions, folding along the line closest to the raw edge and pressing, then folding again along the next line to enclose the raw edge, pressing and then stitching in place.
To construct the right front, follow the steps below:
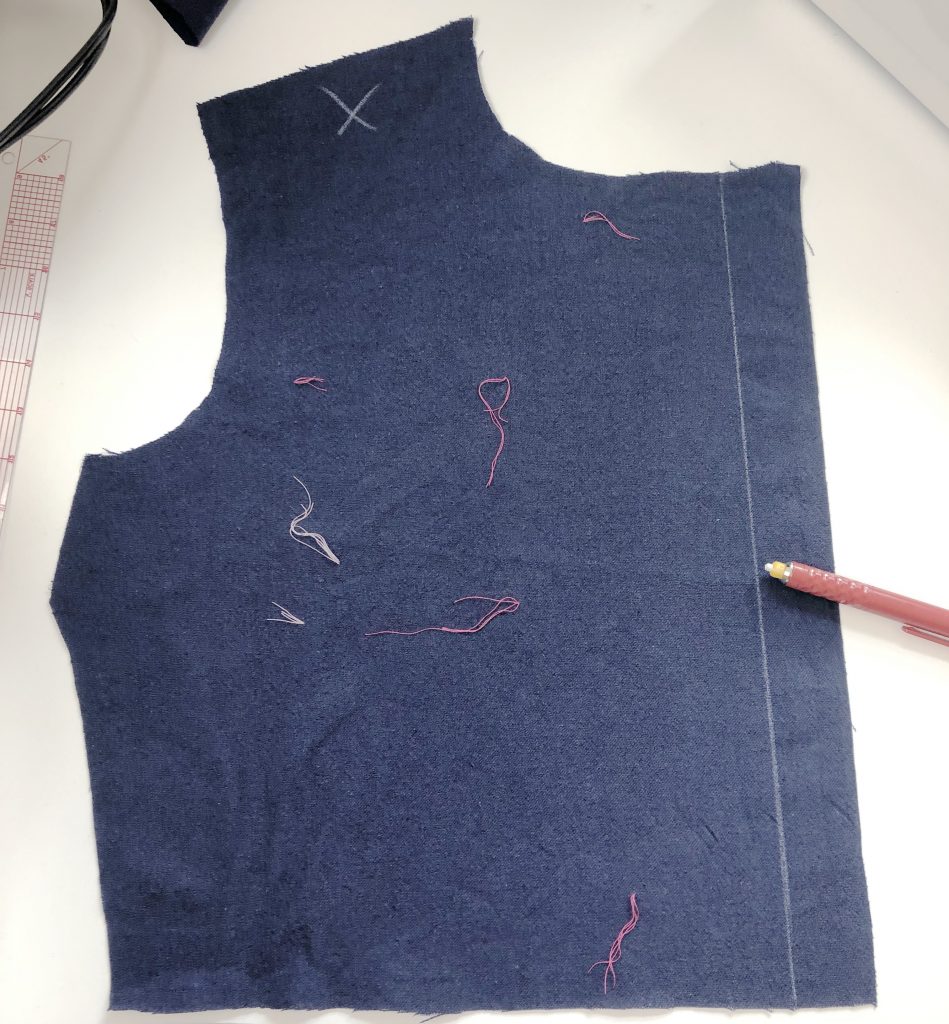
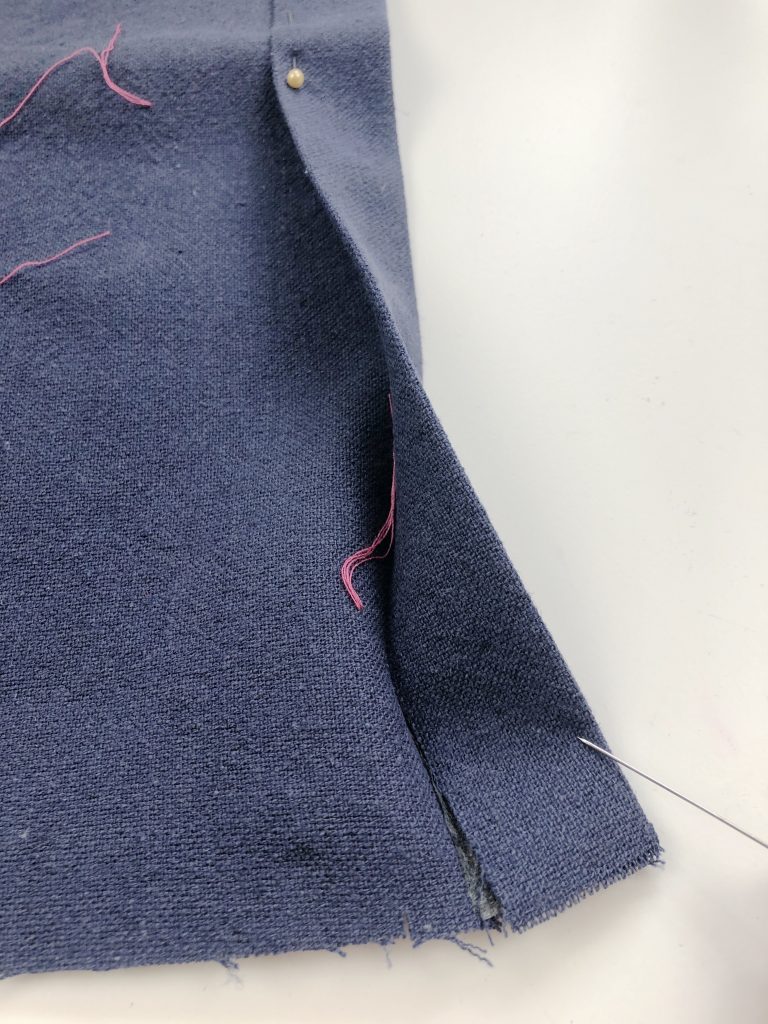
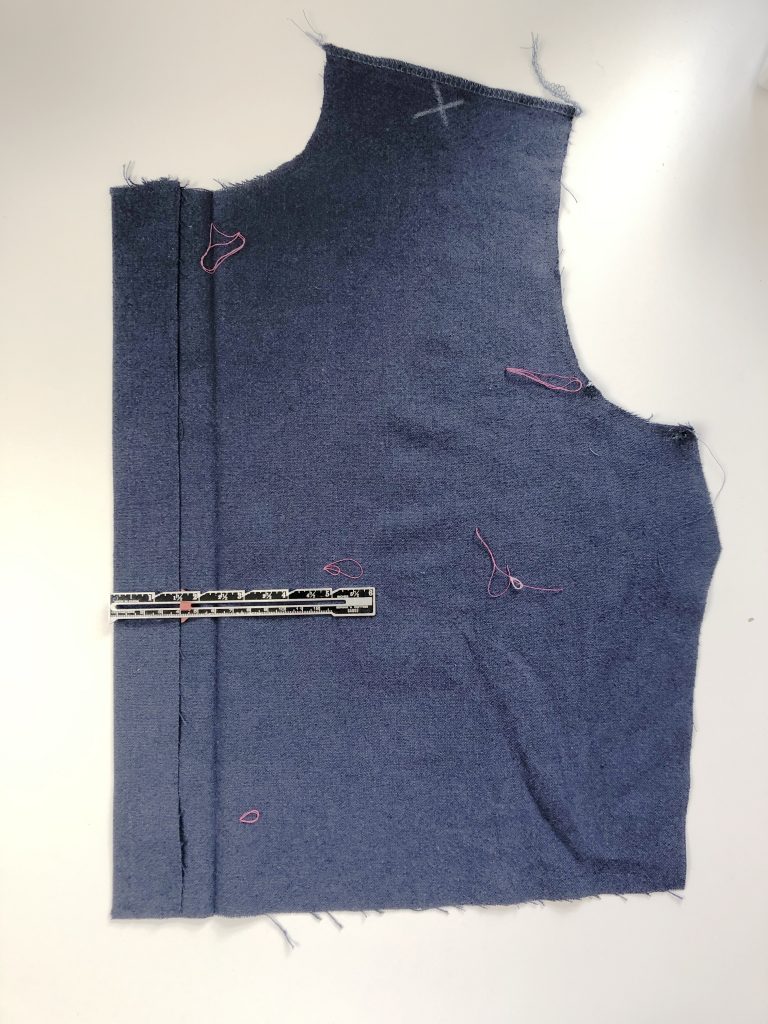
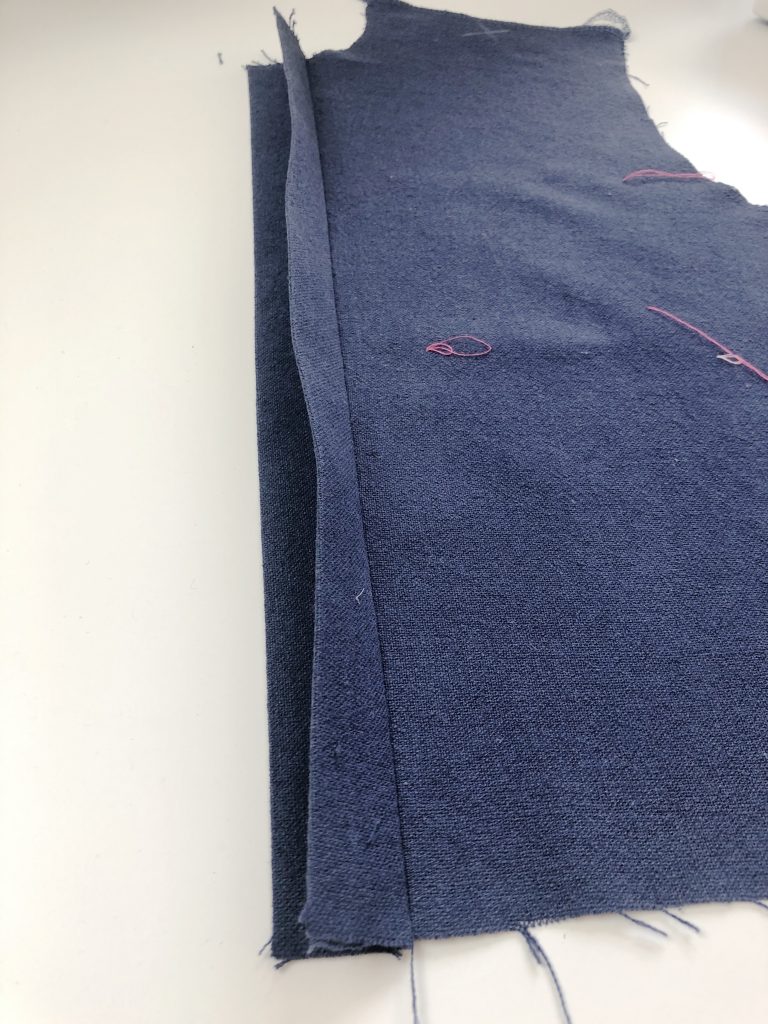
1. Fold the fabric along the fold line closest to the centre front, folding fabric with wrong sides together. (10cm of fabric is folded to the wrong side.) Press in place.
(Pink tailor’s tacks close to front edge in image below show position of top and bottom buttonholes.)
2. Open fabric back out and then fold along the 2nd fold line, 4cm from the raw edge, folding wrong sides together.
You can see the first crease line in the images below.
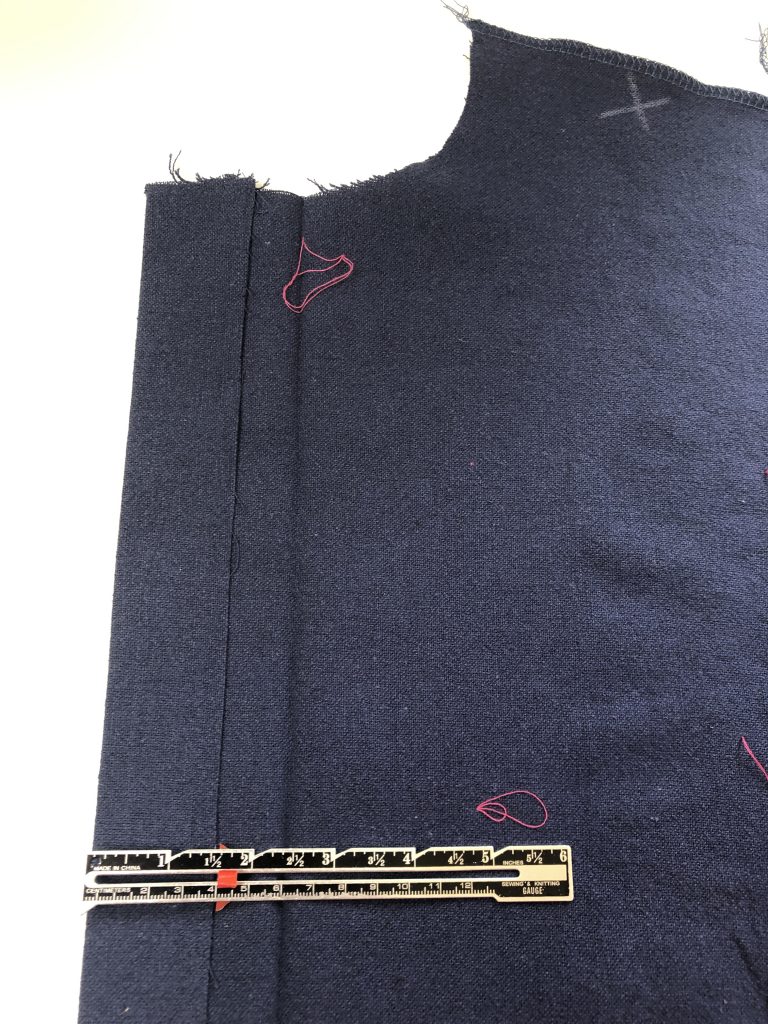
3. Fold along crease line made in step 1 above. Press in place again.
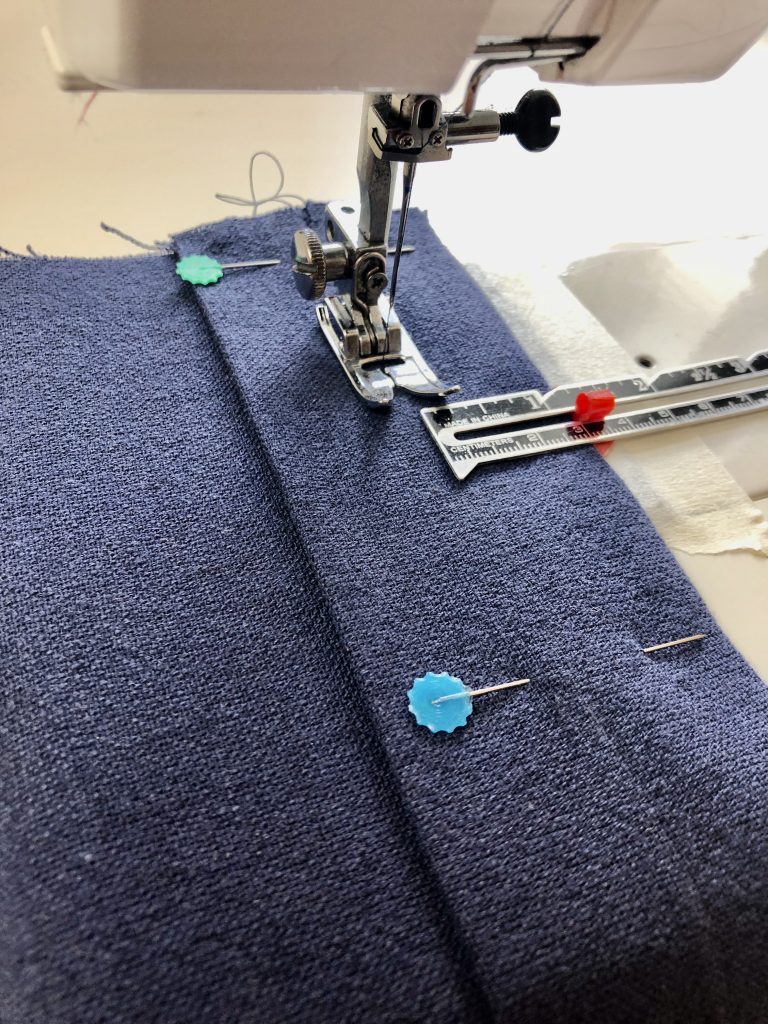
4. Mark a line 3cm from the front edge or mark a line on your needle plate to keep your stitching straight. (I’ve used masking tape)
5. Sew a line 3cm from the front edge through the 3 layers of fabric.
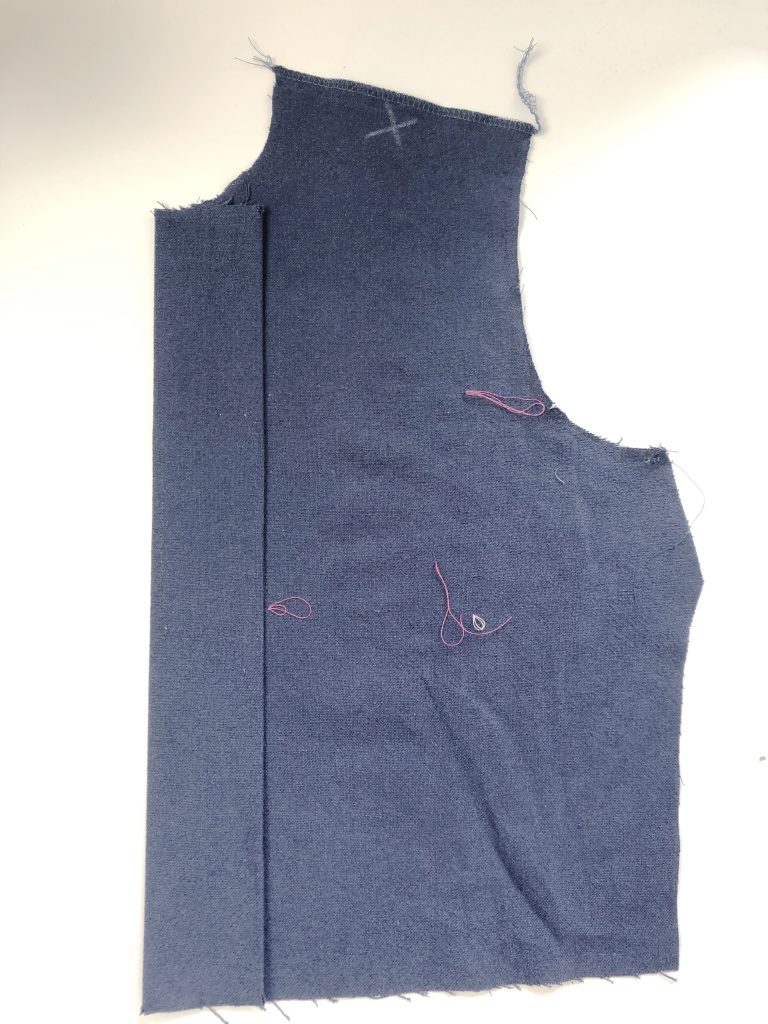
6. Lift inner folded edge of fabric and press towards bodice front edge to create fly front.
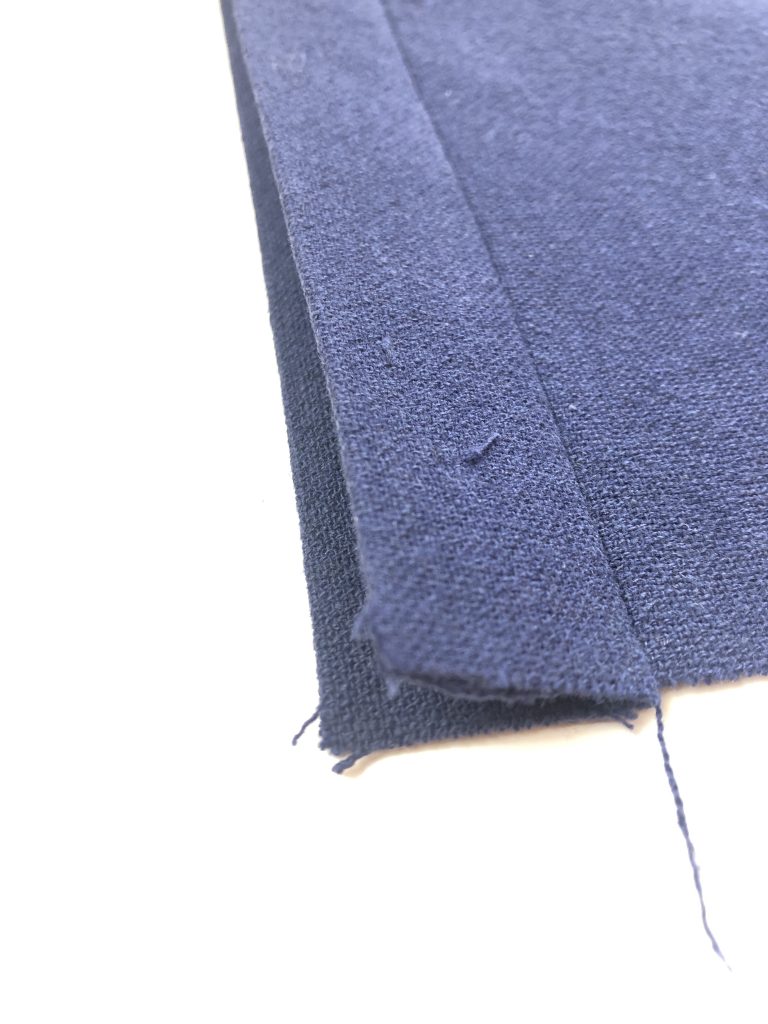
The front fly is now complete.
You can now make the buttonholes.
It’s much easier to do this at this stage rather than later, as once the collar is attached and the bodice stitches to the trousers, the fly front becomes partly enclosed and it’s difficult to get the sewing machine foot under the flap.
In the images below you’ll see that I’ve also sewn on the patch pocket.
Mark the buttonholes according to the pattern markings.
The pattern shows where the buttons will be placed so the buttonhole will start about 3mm above this marker.
I made a trial buttonhole in scrap fabric and measured its length.
I took the markings from the pattern for the top and bottom buttonhole and then evenly spaced out the rest to account for my additional 2cm adjustment to length.
My machine forms buttonholes by stitching backwards so I marked the bottom of each buttonhole with a pin.
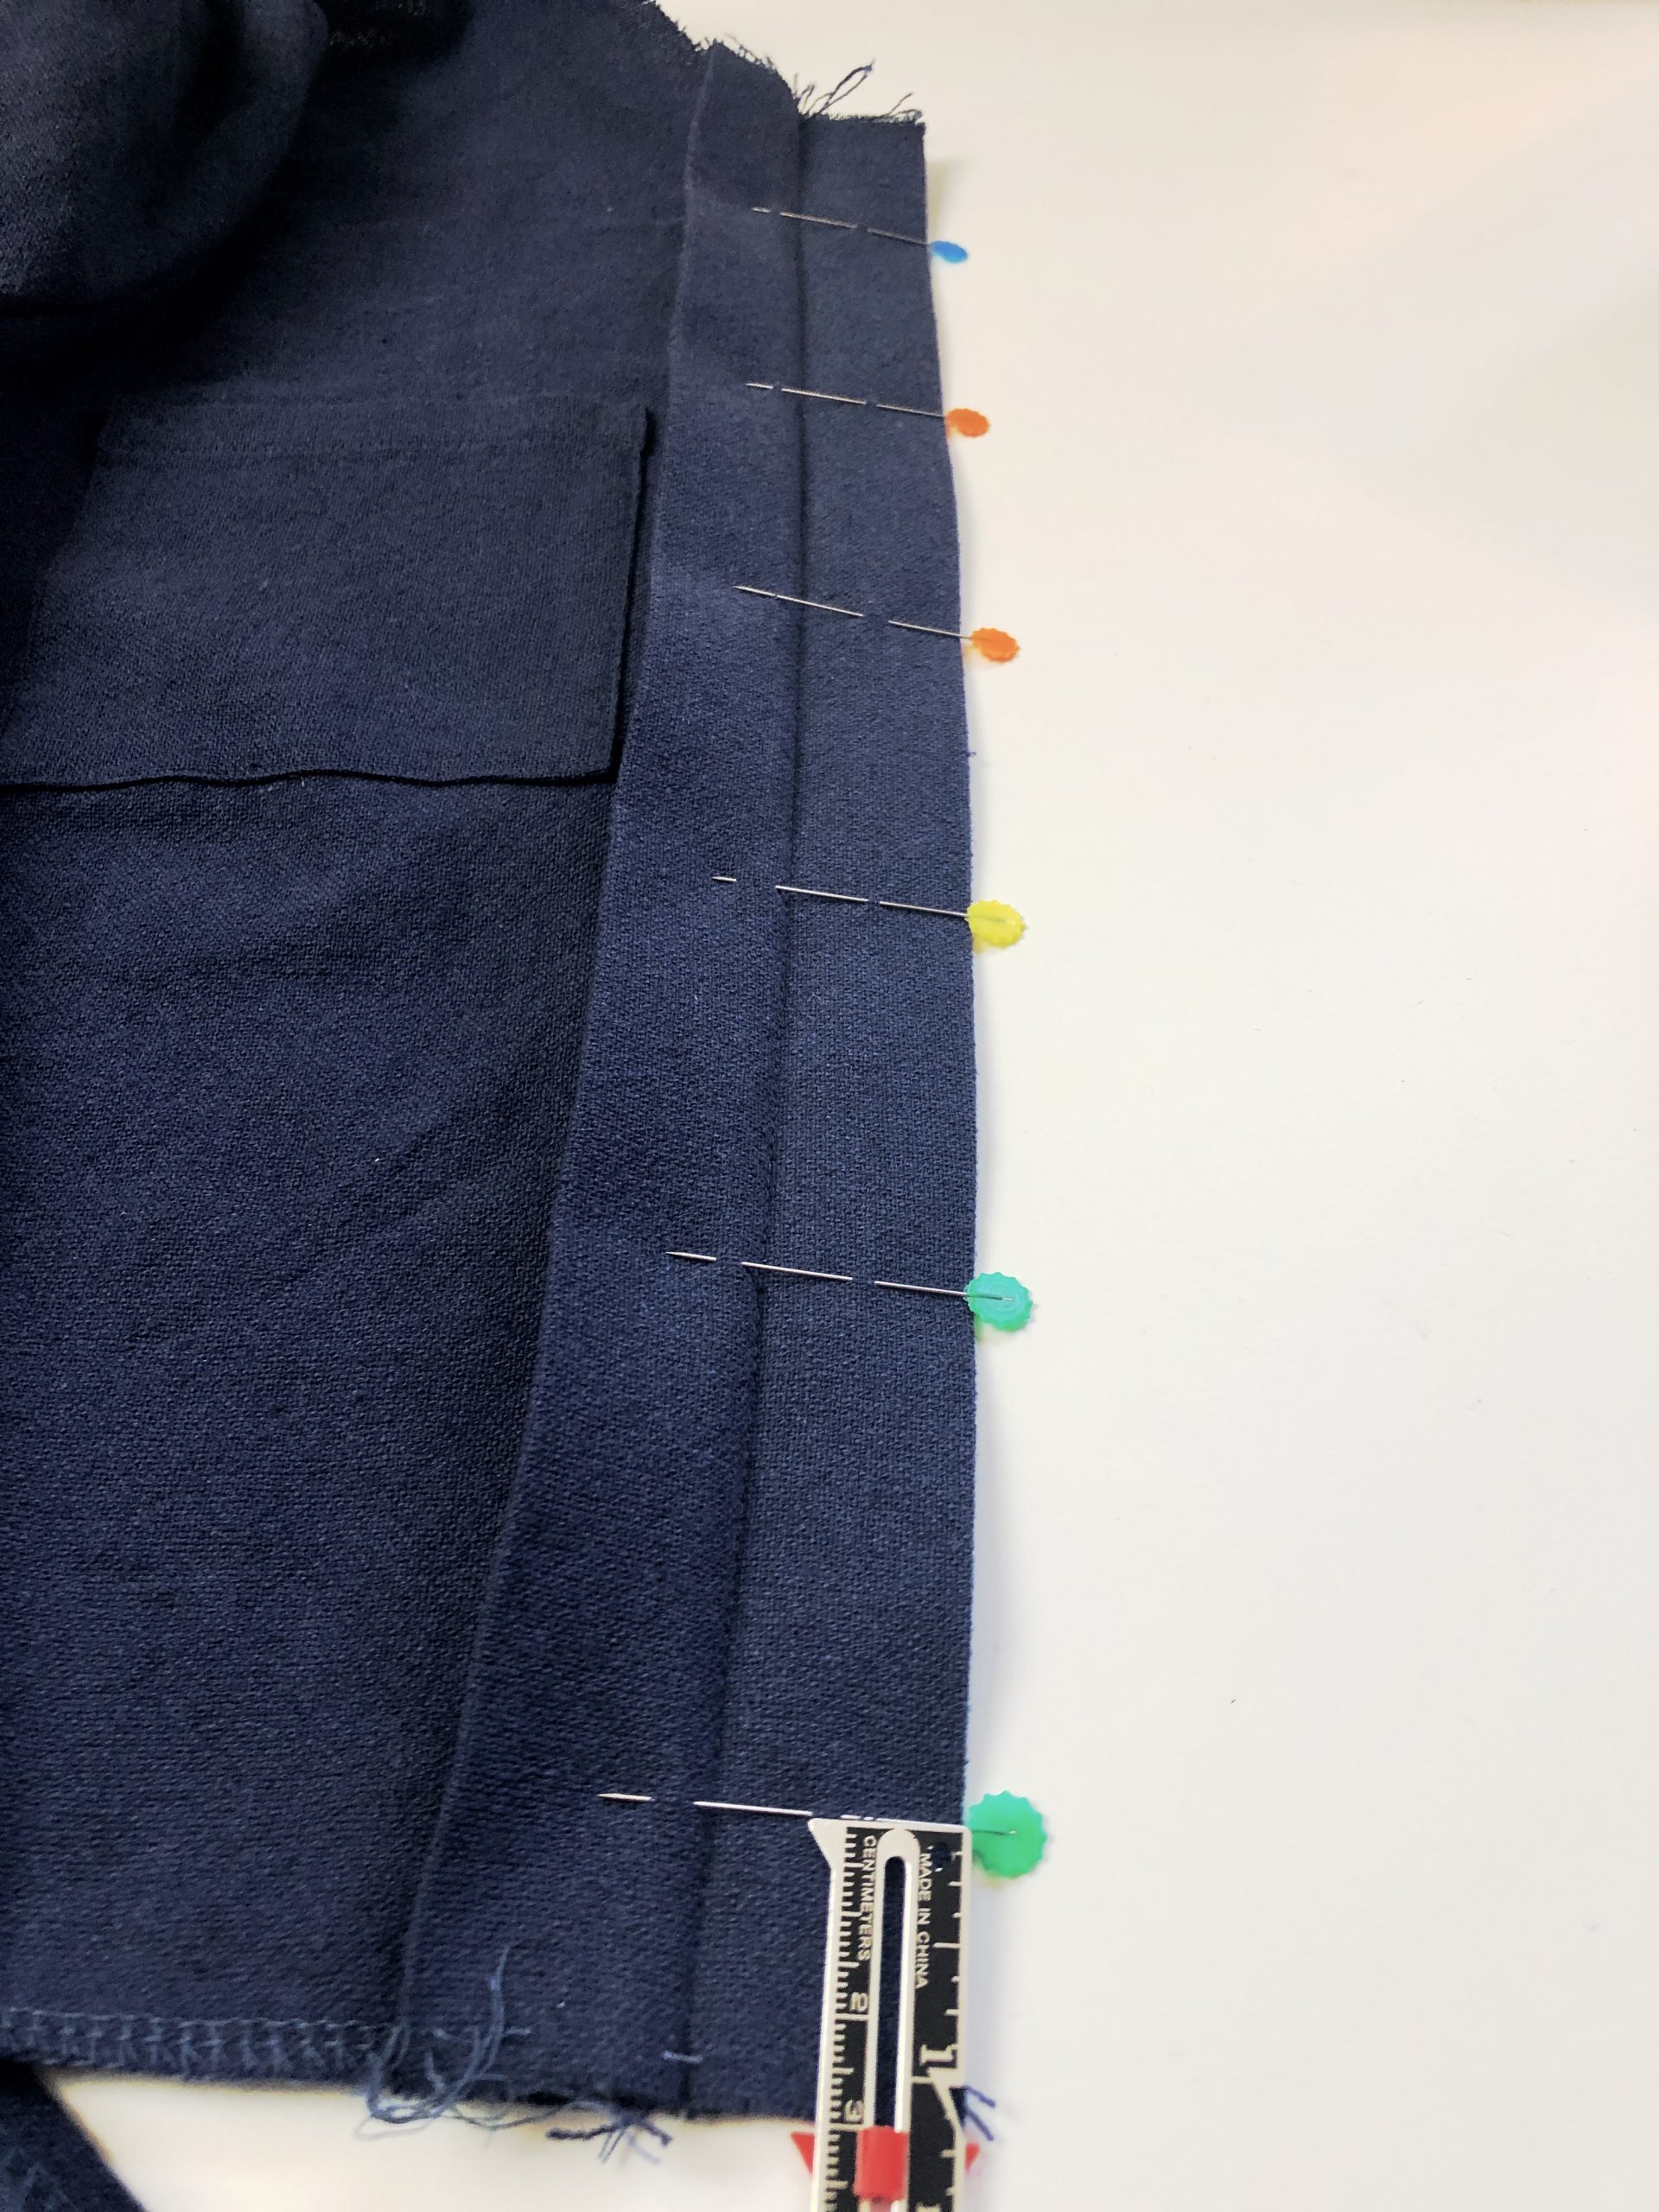

I stitched each of the buttonholes and then cut them open.
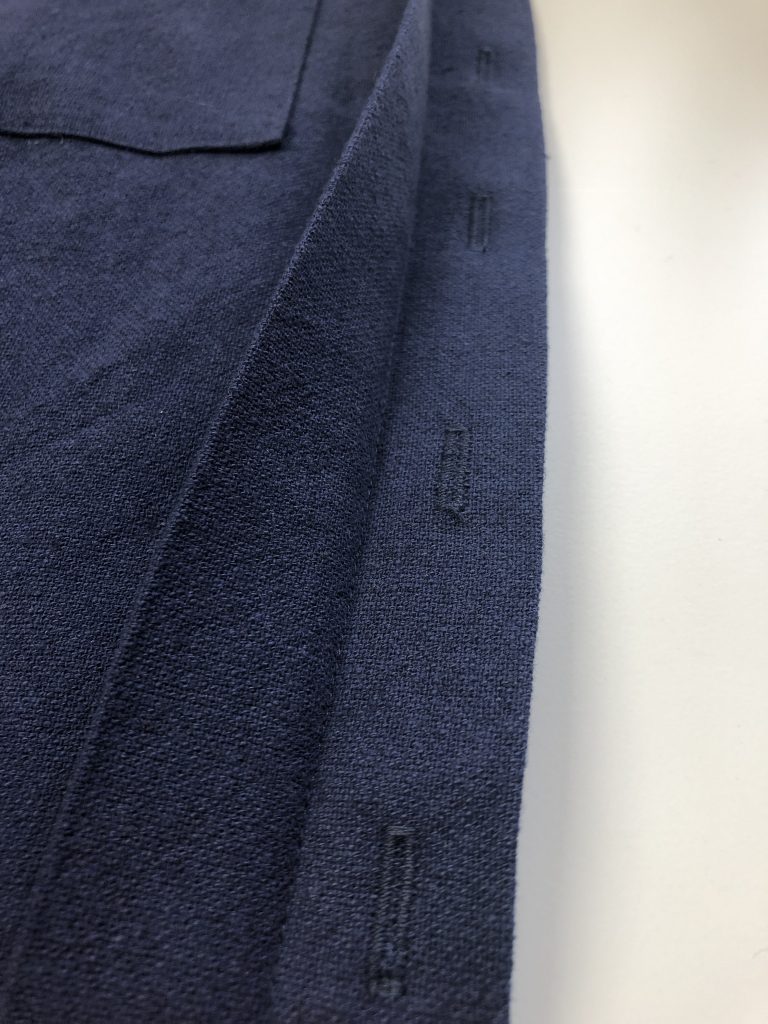
After forming the buttonholes, press the stitches to embed them into the fabric.
You can now continue with the rest of the construction process, according to the pattern instructions.
I’ve provided more details on construction and the changes I made over on The Lennox Boilersuit post.
I hope you found this post useful!
Happy sewing
x


5 thoughts on “Adding a Fly Front or Concealed Button Placket”
Pingback: The Dayo Dress - Julia Hincks | House of Miss Sew
Pingback: The Lennox Boilersuit - Julia Hincks | House of Miss Sew
Pingback: Pattern Review – Filippa Shirt Dress by Fibre Mood - Julia Hincks | House of Miss Sew
That’s a great tutorial Julia on sewing the button fly; I’m not quite sure however how the top of the fly is finished and couldn’t quite work it out from the photos. Is it caught under the collar stand and closed off that way, then with one button above on the collar stand? Your clarification would be a great help as I’ve drafted a blouse with a collar and button fly and am not 100% sure how to finish it.
Thanks, Debbie
Hi Debbie
Thanks for the positive feedback 😊.
Yes – you’re right, the top of the fly is caught under the collar stand and then there should be a button and buttonhole on the collar stand.
Annoyingly the top button is seen and can’t be hidden like the others on the fly front. I tried to conceal the fastening by adding a covered press stud instead of a button and buttonhole.
You can see this in my other blog post about the Lennox Boilersuit here: https://www.houseofmisssew.com/the-lennox-boilersuit/
I hope that helps.
Julia
x
Comments are closed.