
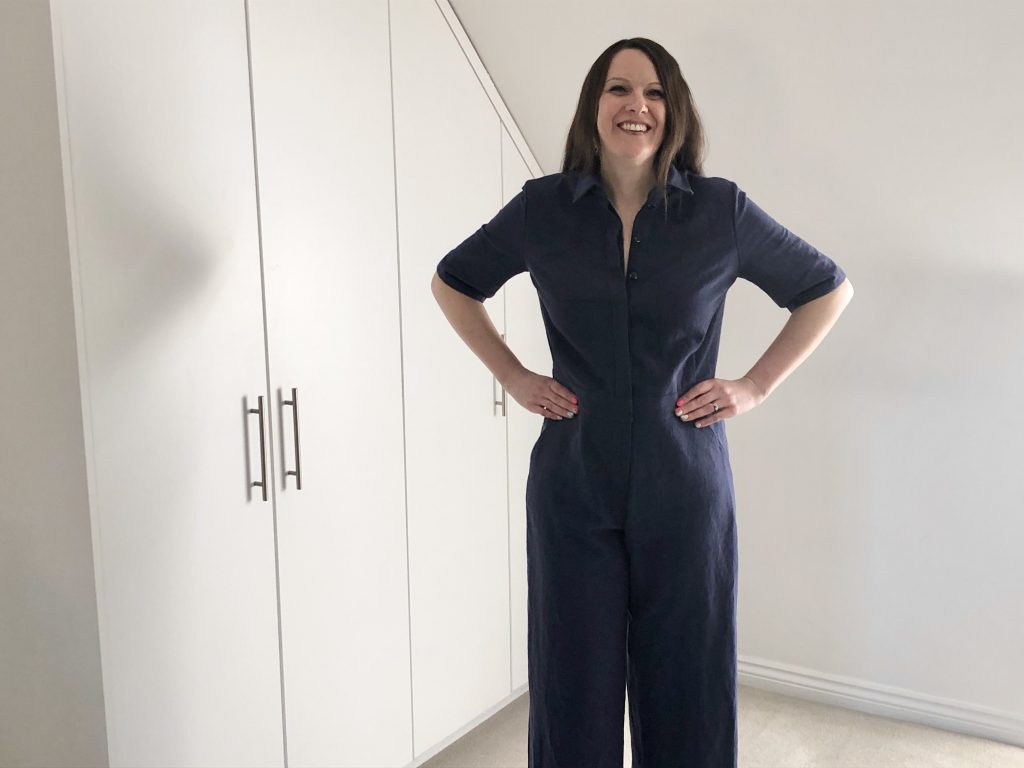
I was asked to make the Lennox Boilersuit by Josie at Fabric Godmother. This garment was going to be the next pattern and fabric combination for the April 2021 Dream Wardrobe Subscription Box.
I was really excited to make this for myself so this would be a good trial run to test out the pattern.
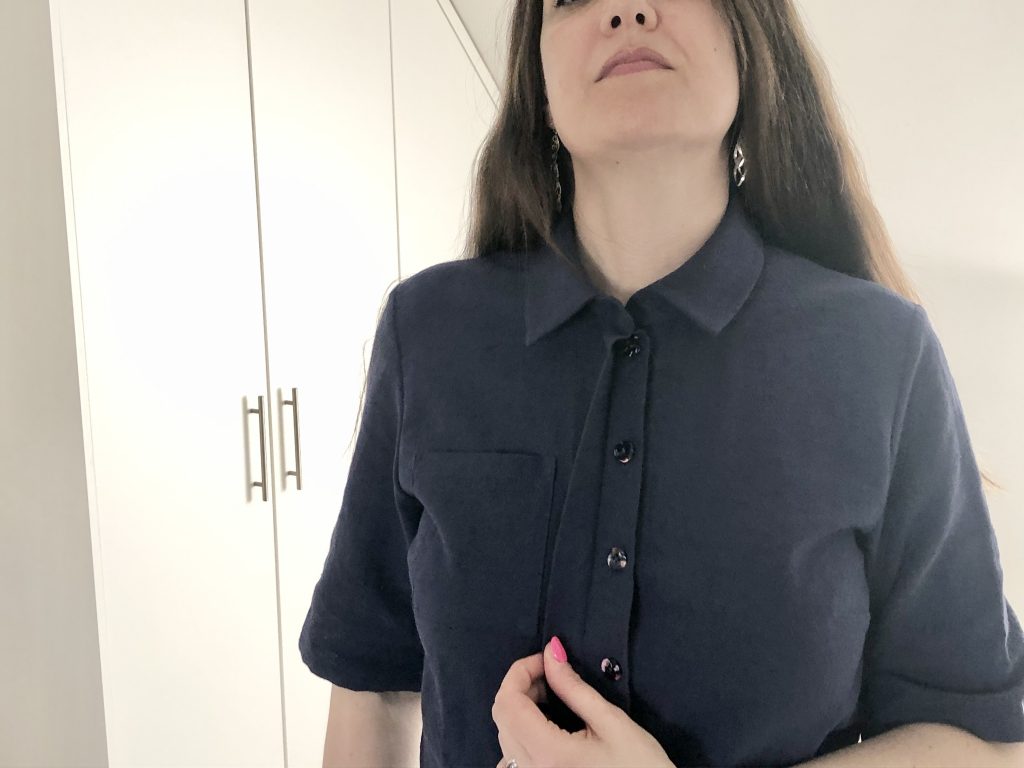
I’ve used a cotton and linen blend fabric in ‘denim’ from Fabric Godmother.
The garment has a button down front with a fly zip and a hook and bar fastening at the waistband. The garment pictured on the Homer + Howells website shows the use of press studs or snap fasteners. For my version, instead of snap fasteners, I changed the opening to create a fly front, otherwise known as a concealed button stand, so I could use buttons but they would be hidden from view.
Adding a Fly Front
I’ve created a video showing how to adapt the front bodice pattern to add the concealed button stand which you’ll find below.
I’ve also written a tutorial which you’ll find over on my other post ‘Adding a Fly Front or Concealed Buttonstand’ which explains all the adaptations and changes I made to the pattern and the construction process to include the fly front.
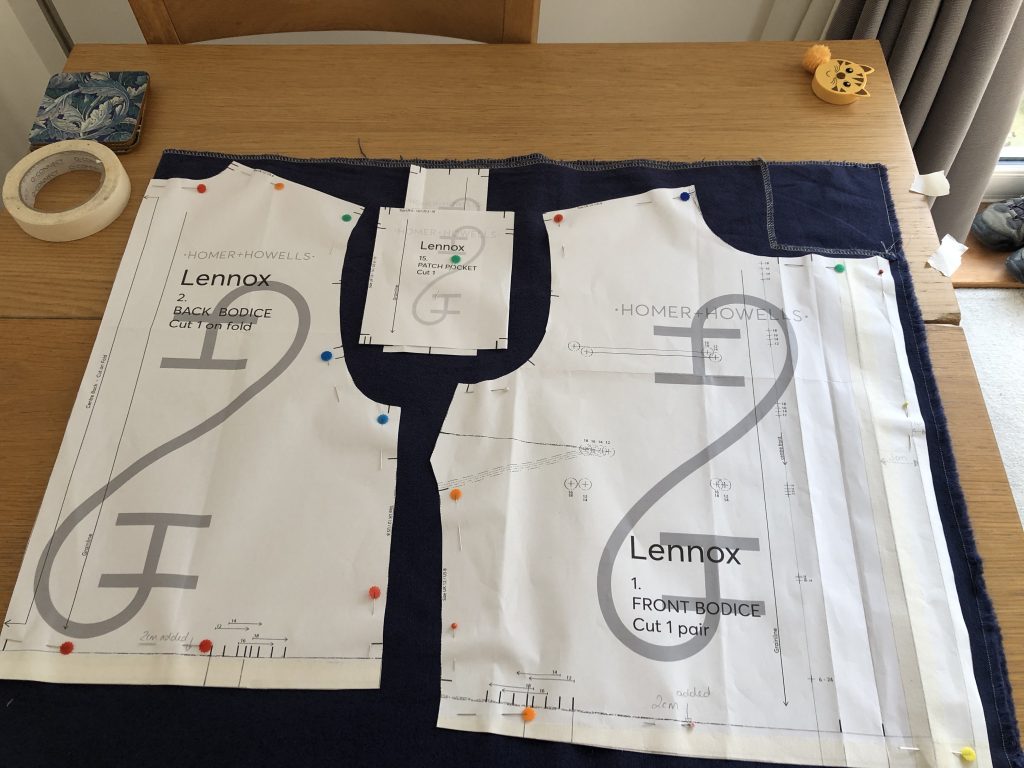
Cutting Out the Pattern
The pattern instructions show how to lay out the pattern pieces onto a single layer of fabric.
This may be the most economic way to cut out the pieces but I decided not to do this as it’s quicker to cut through a double layer of fabric to cut two of each pattern piece.
Check you can fit everything onto the fabric before cutting out! I’m not taking the blame for this bit going wrong 🙂
I’ve added 2cm to the bodice, 10cm to the legs and blended from a size 12 top and waist to a size 16 hip. I’m 6’2″ (1.88m) and usually fit into tops in a size 12/14 in shops and trousers in anything from a size 14-18, depending on the shop.
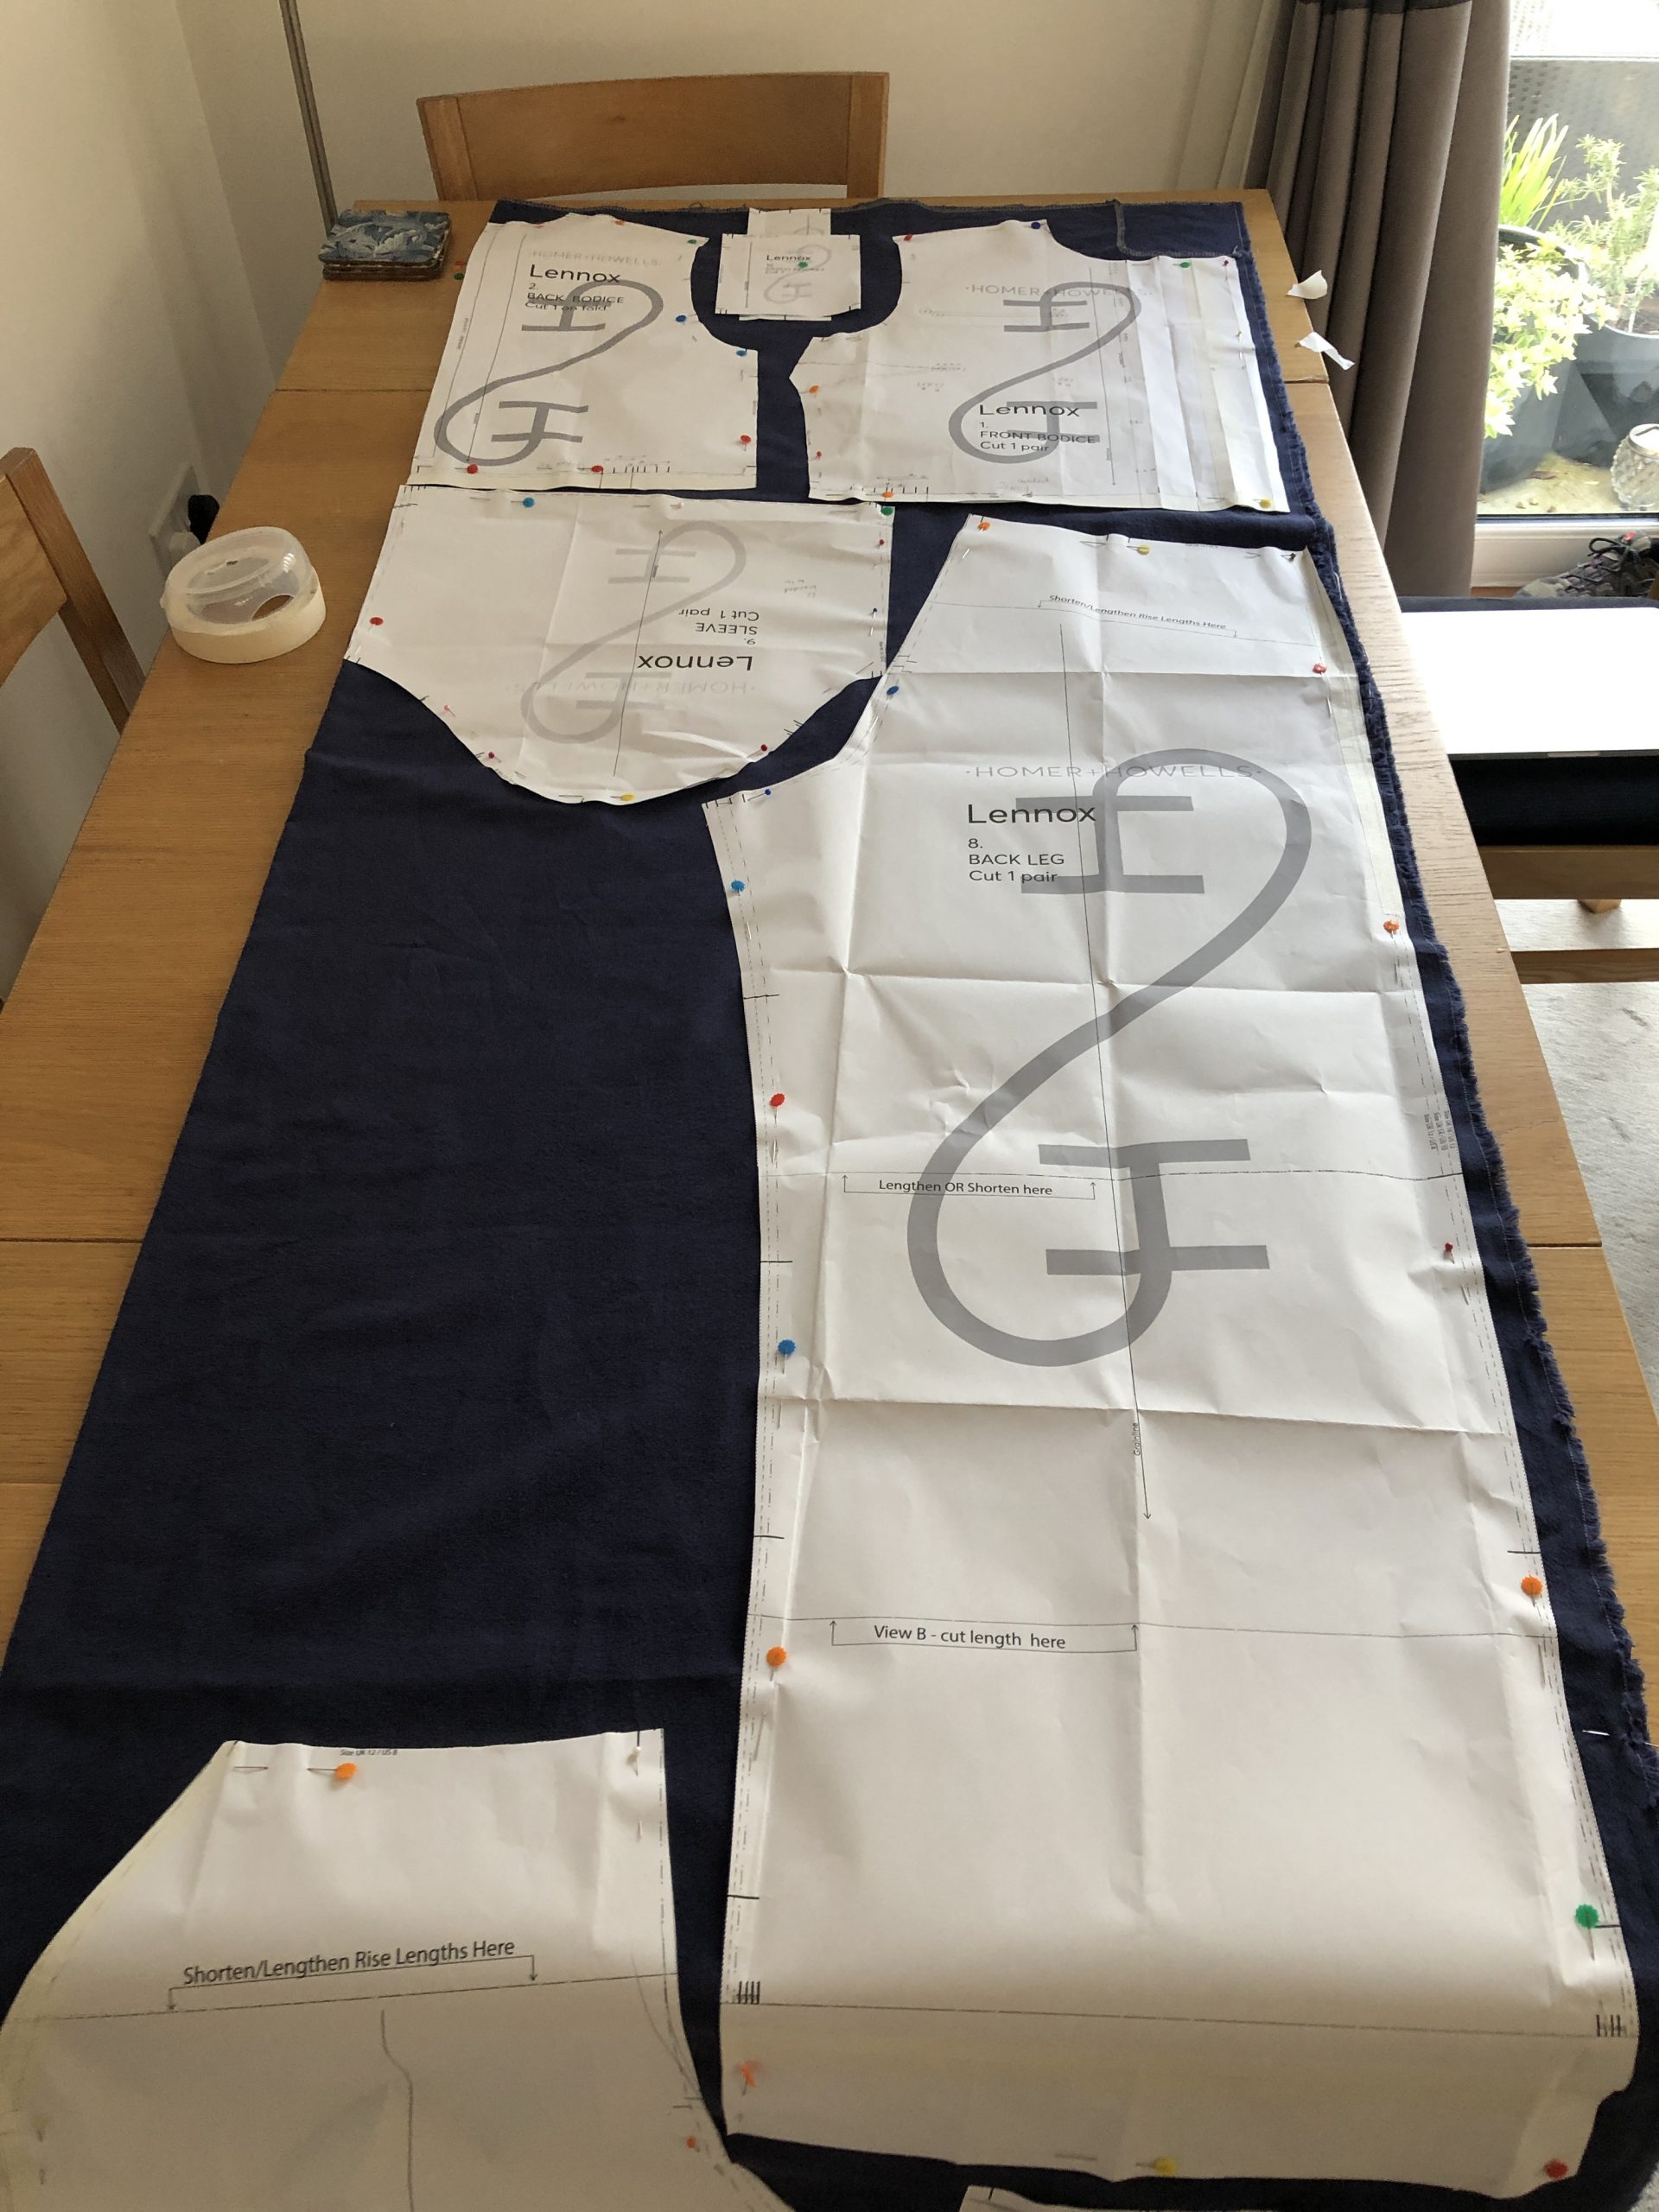
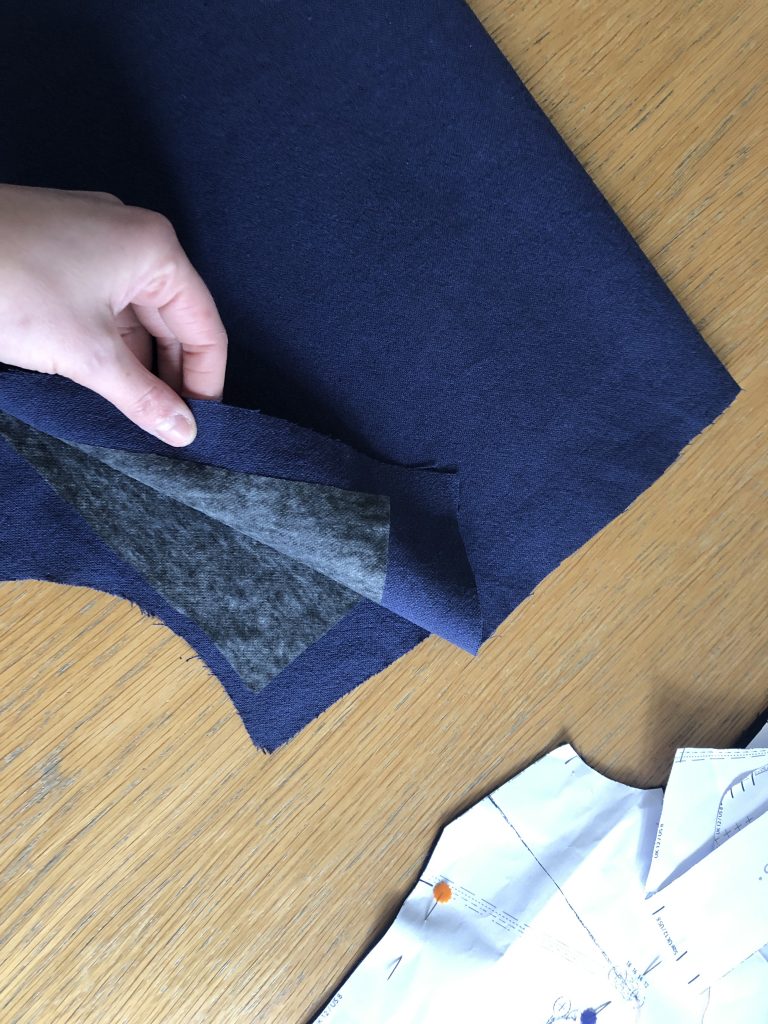
I folded the fabric right sides together and cut out everything except those pieces requiring interfacing.
It was quite difficult to decide on the right and wrong side of this fabric but one side feels a little smoother than the other.
The sleeve was slightly squeezed into place so this layout might not work for larger sizes – I cut a size 12 sleeve head, blended to a 16 for the cuff to give a little more room for the bicep.
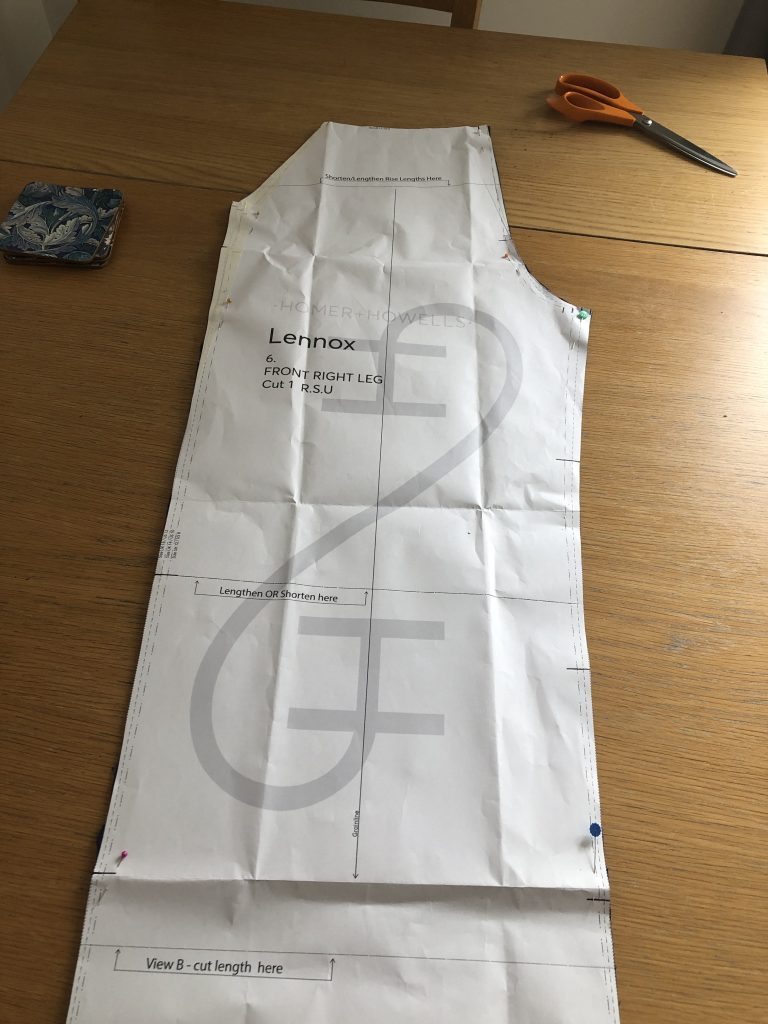
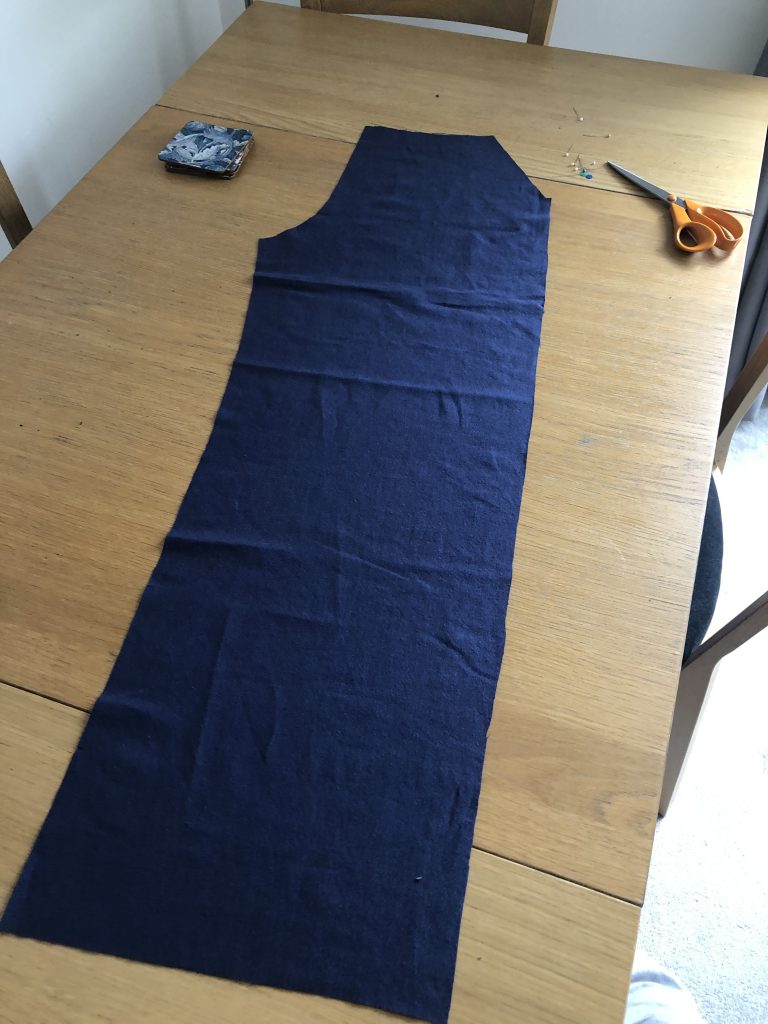
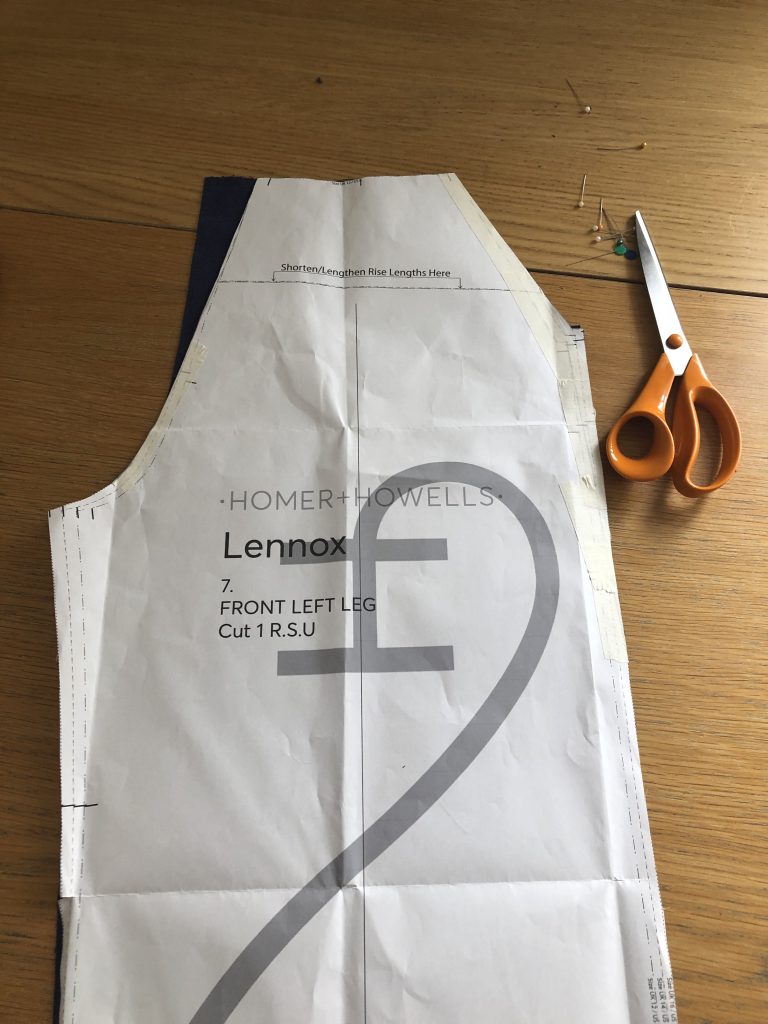
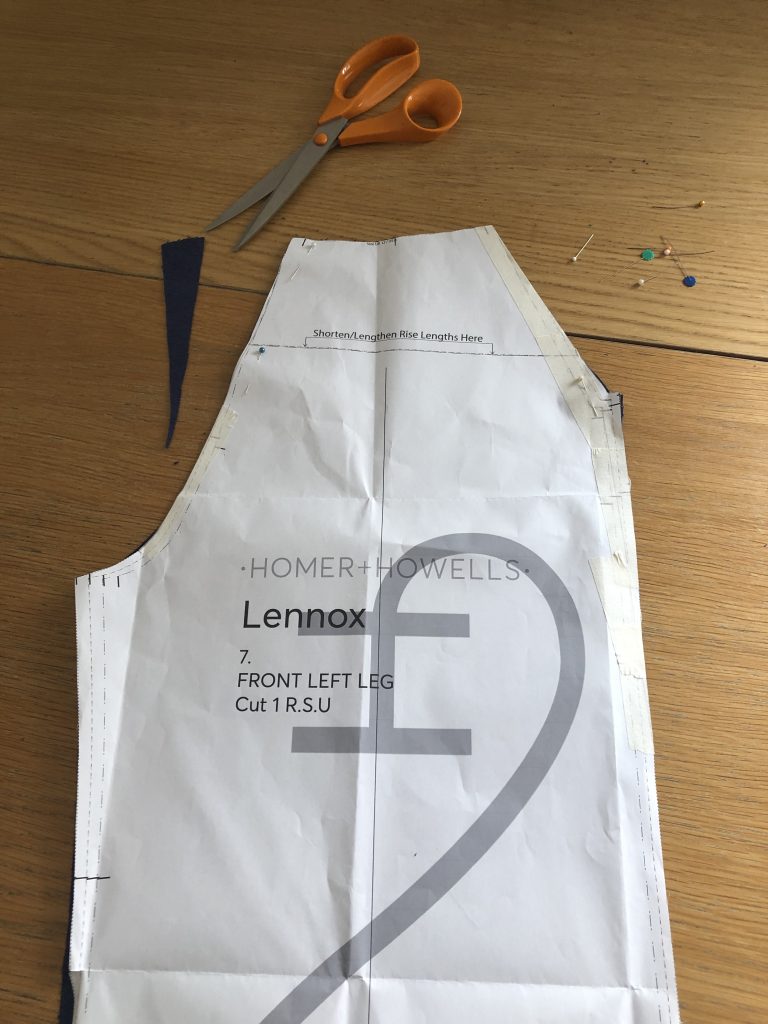
The front leg pieces differ only in the centre front seam section so to make it easier to cut out the pieces, I cut out 2 x right front legs.
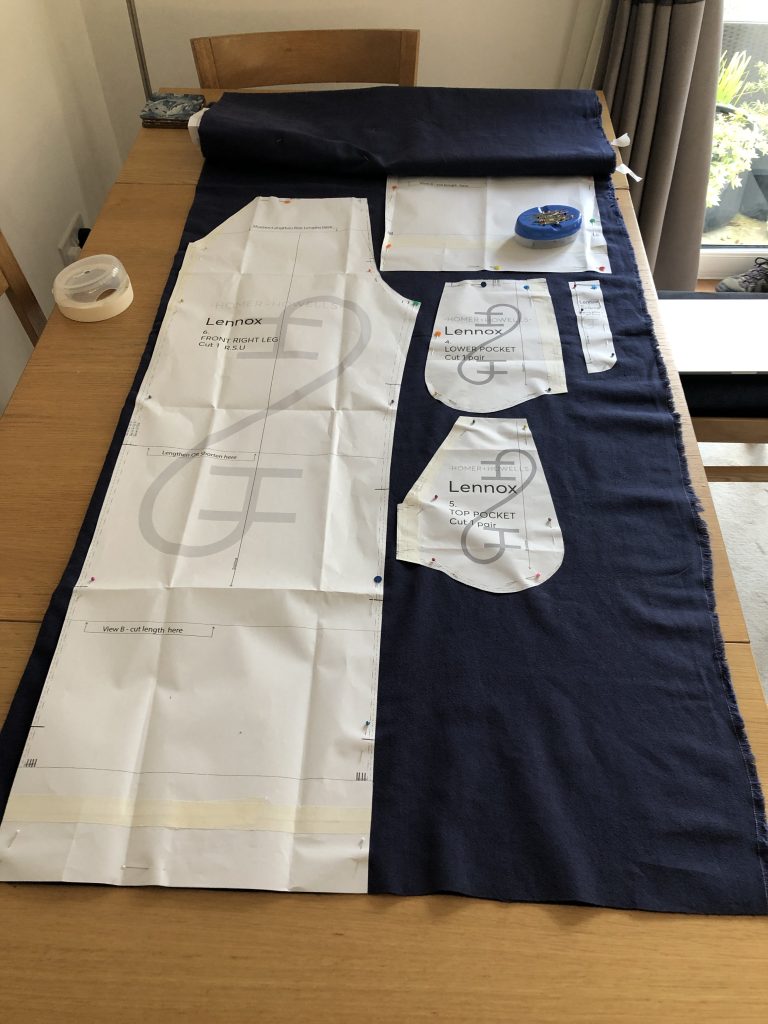
After cutting the right legs out, I put one piece aside for the right leg and trimmed off part of the centre front seam of the remaining piece for the front left leg.
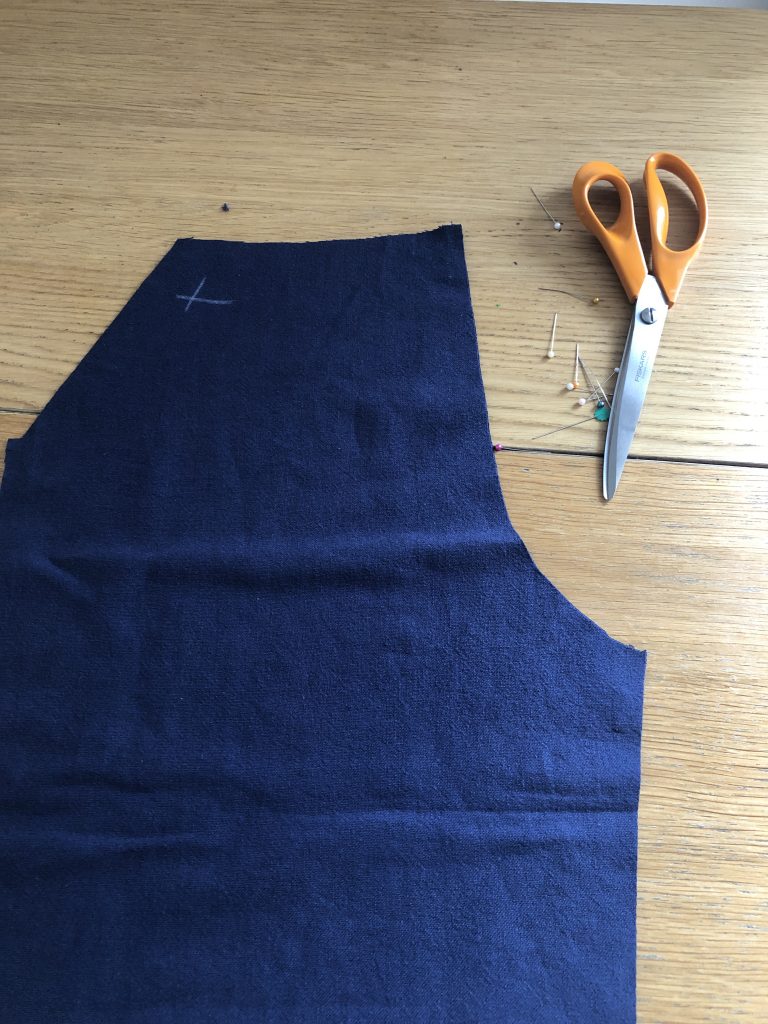
As I cut the pattern pieces I also chalked an X onto the wrong side of each piece to make sure I didn’t end up with two right legs, or two left sleeves!
I removed the right leg pattern piece and put one fabric piece put to the side.
I placed the remaining front leg piece so the right side of fabric was facing up.
I laid the left front leg pattern piece on top of the fabric and trimmed off the excess fabric from crotch seam area.
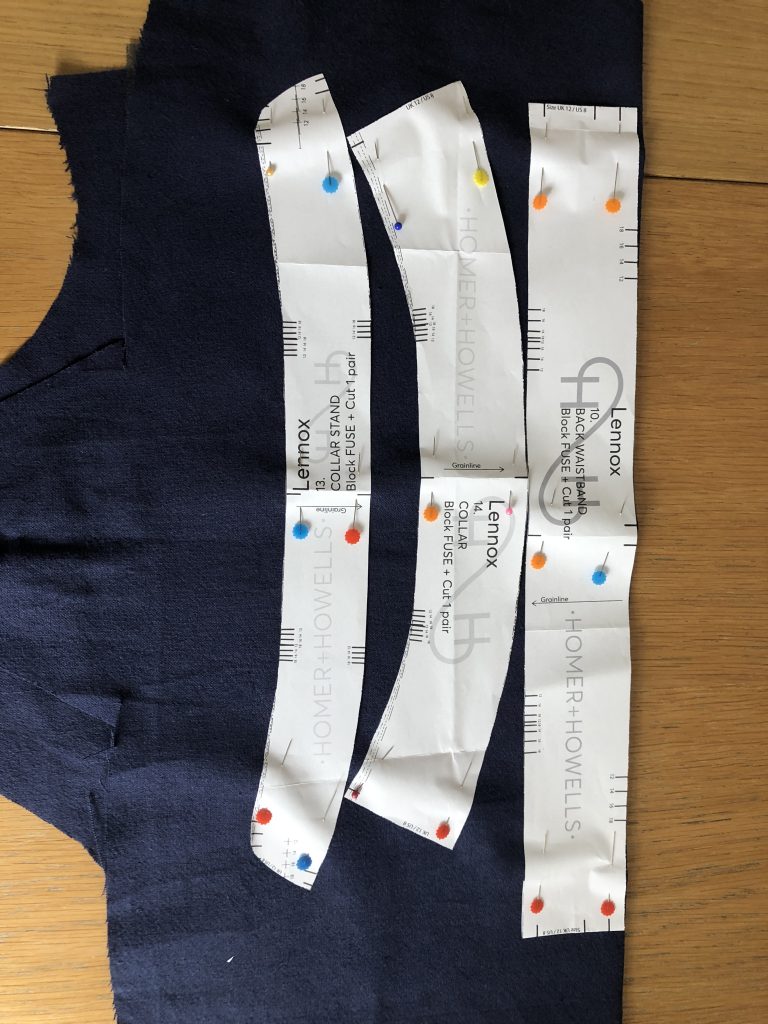
After cutting out all pieces except for those requiring interfacing, as suggested in the instructions, I block fused the remaining pieces of fabric (added interfacing to the whole piece), folded this wrong sides together, and then cut out the collar, collar stand and waistband pieces.
My Tips:
Cutting notches
Take care when snipping the notches – the marked lines are 8mm long and the seam allowance is 1cm. I snipped just 5mm into the notches.
Making up the garment
I used a size 90/14 needle and had no issues as the fabric is really easy to handle and sew.
Follow directions for staystitching and edge finishing carefully. Staystitching should be 5mm from the raw edge so it sits within the seam allowance. The seam allowances are 1cm in most places except the collar edge, trouser pocket opening and zip guard where these are only 6mm.
The instructions suggest adding interfacing only to the right on the buttonhole packet but I think that both the buttonholes and buttons need a little bit of reinforcement so I interfaced both left and right sides.
I added a fly front to the bodice which you’ll see on my other post ‘Adding a Fly Front or Concealed Buttonstand.‘ Since I made this adjustment I made the buttonholes at stage 5 as they’d be too difficult to sew after applying the collar.
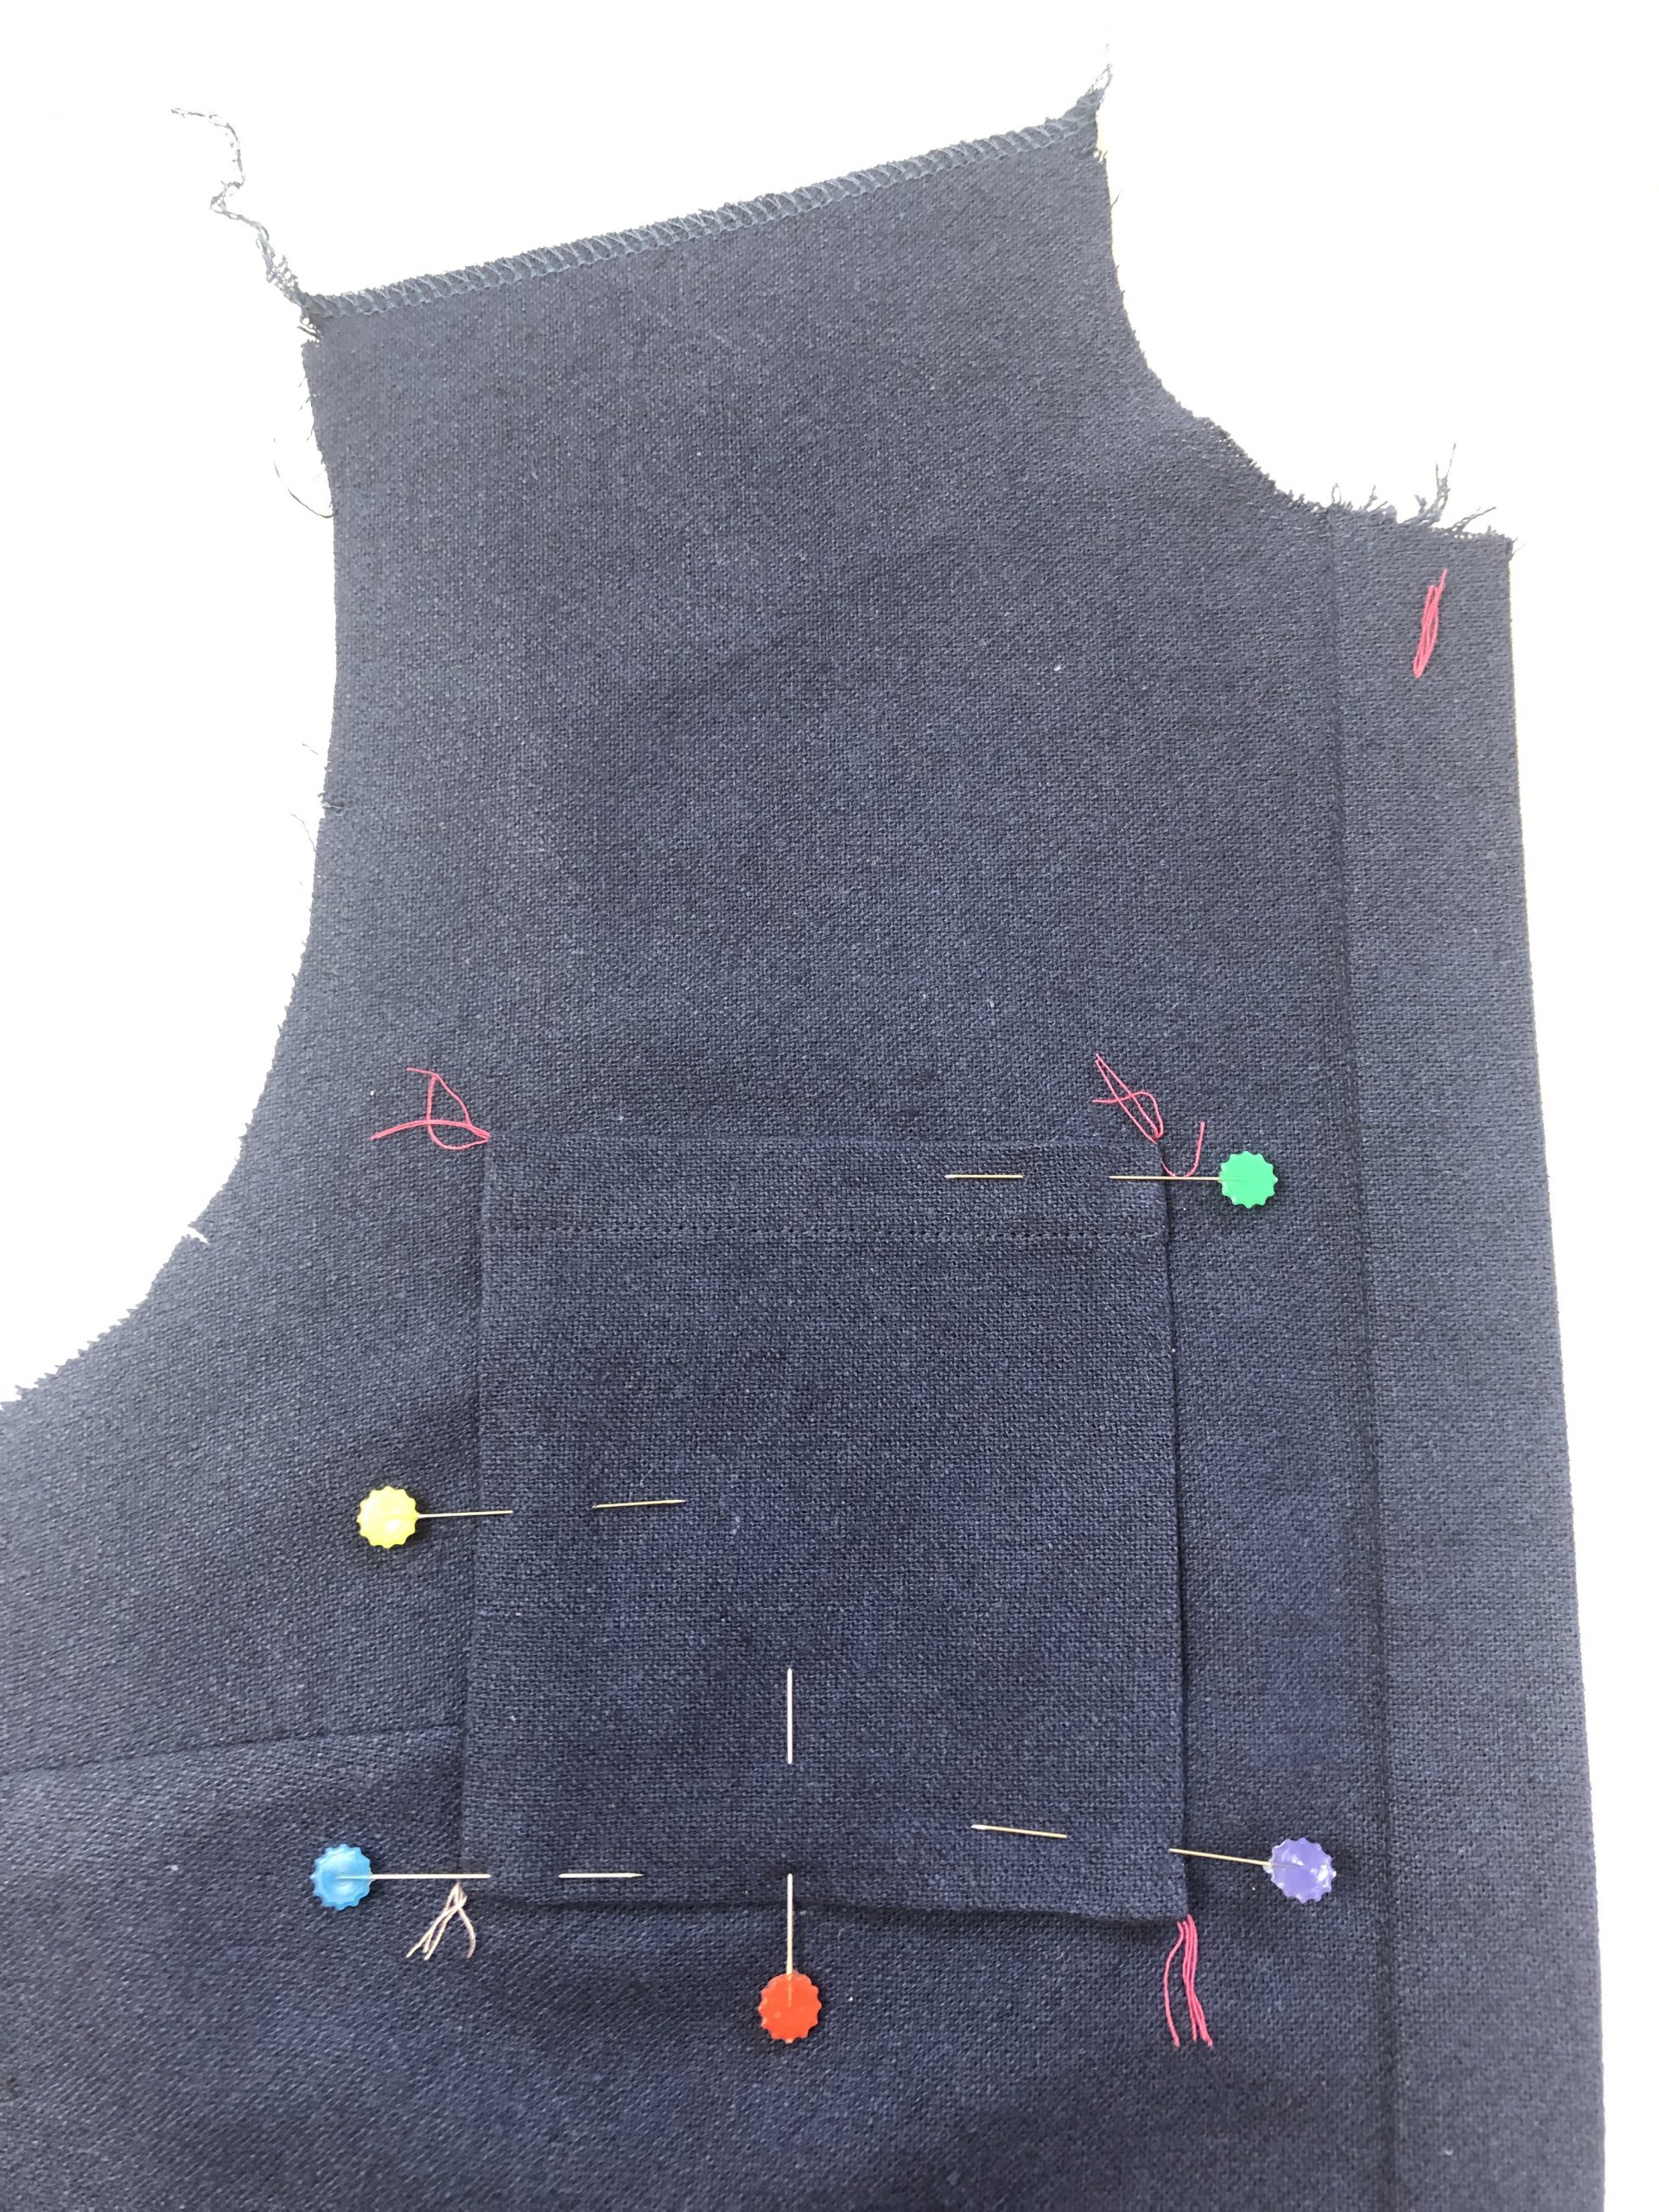
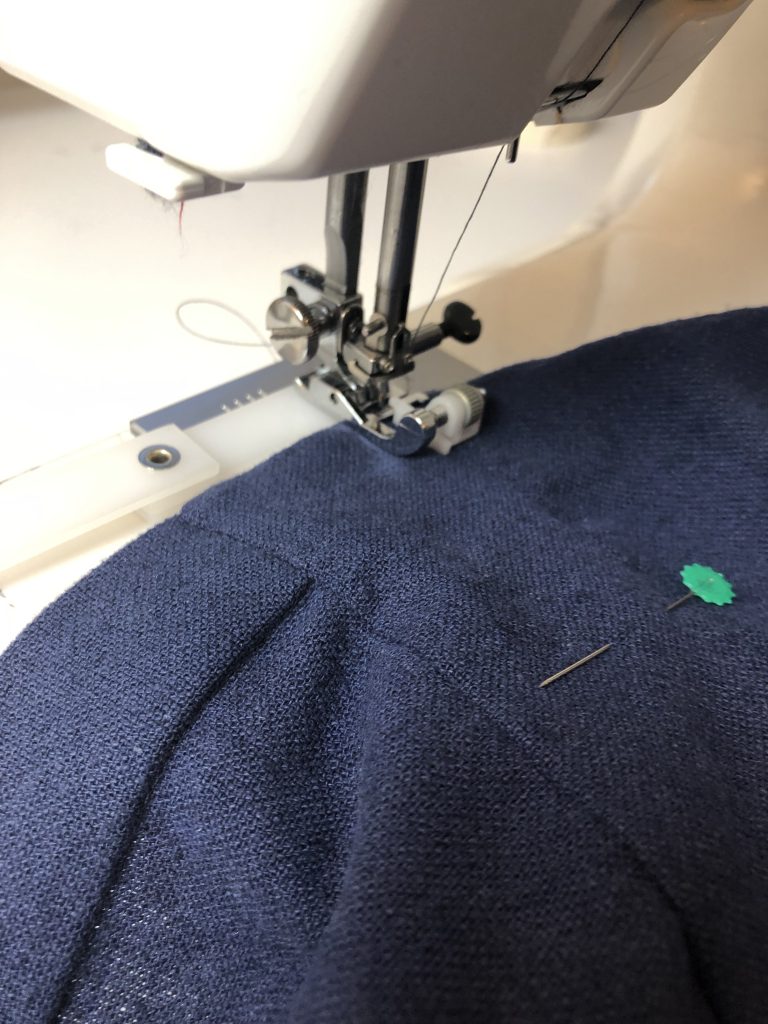
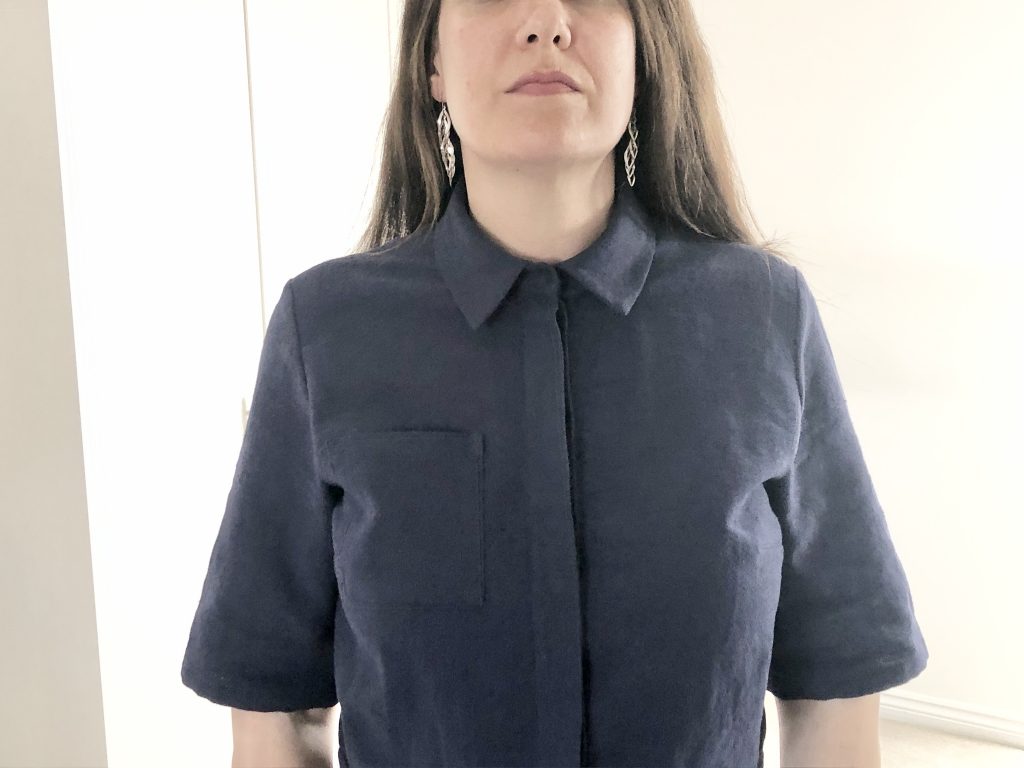
The instructions include attaching the pocket at stage 11 but I think it’s easier to do this after stage 5, once the bust darts have been sewn but the garment is still flat. Pin the shoulder seam together so you can try on the top and check the position of the pocket.
When I attached the pocket I used a height compensation tool, or hump jumper to keep the presser foot level at the start and end of the stitching.
You can place the height compensation tool under the back of the presser foot to get started, or hold it at the front to keep the foot flat at the end of the stitching line.
You don’t need to buy a fancy gadget – you can make your own by folding up a piece of thick fabric.

I like to attach my collars in a slightly different way than the pattern shows as I prefer the finish I get from this method.
I started by sewing the two collar pieces together as shown in the instructions and then attached the collar stand to the neckline.
Next the collar is sewn to the collar stand and then the outer collar is sewn in place.
You can see my method on this video below:
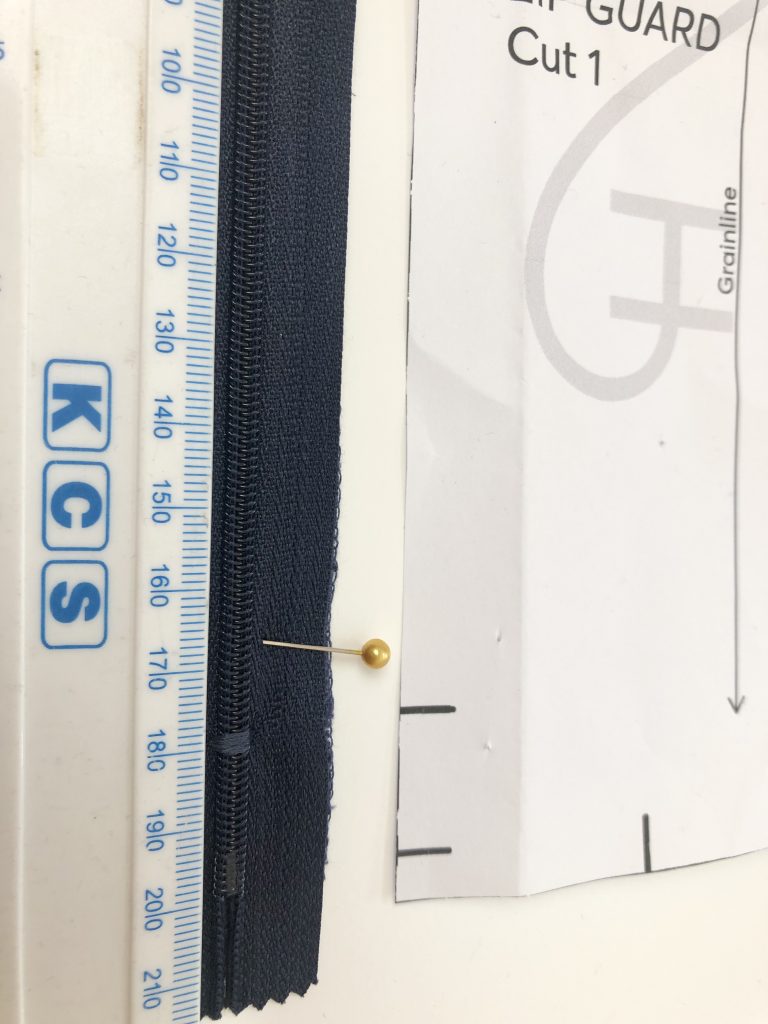
I didn’t have a zip the correct length so I shortened one by oversewing across the bottom of the zip tape to create a new zip stop. I measured from the top of the zip pull, not the top of the tape.
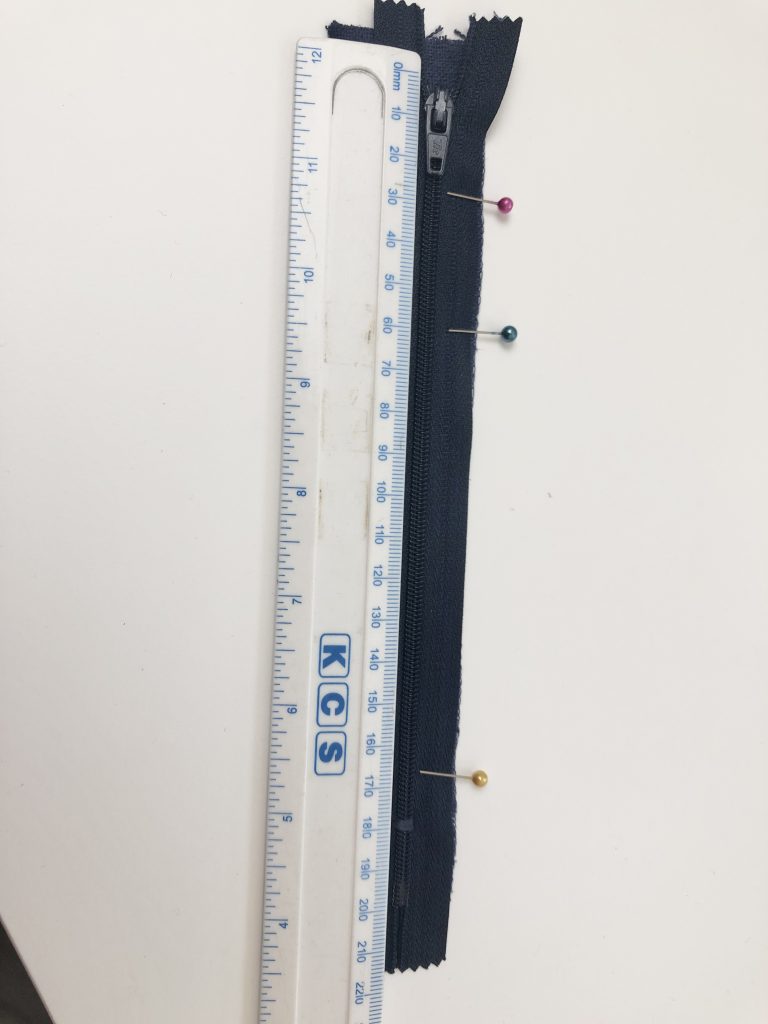
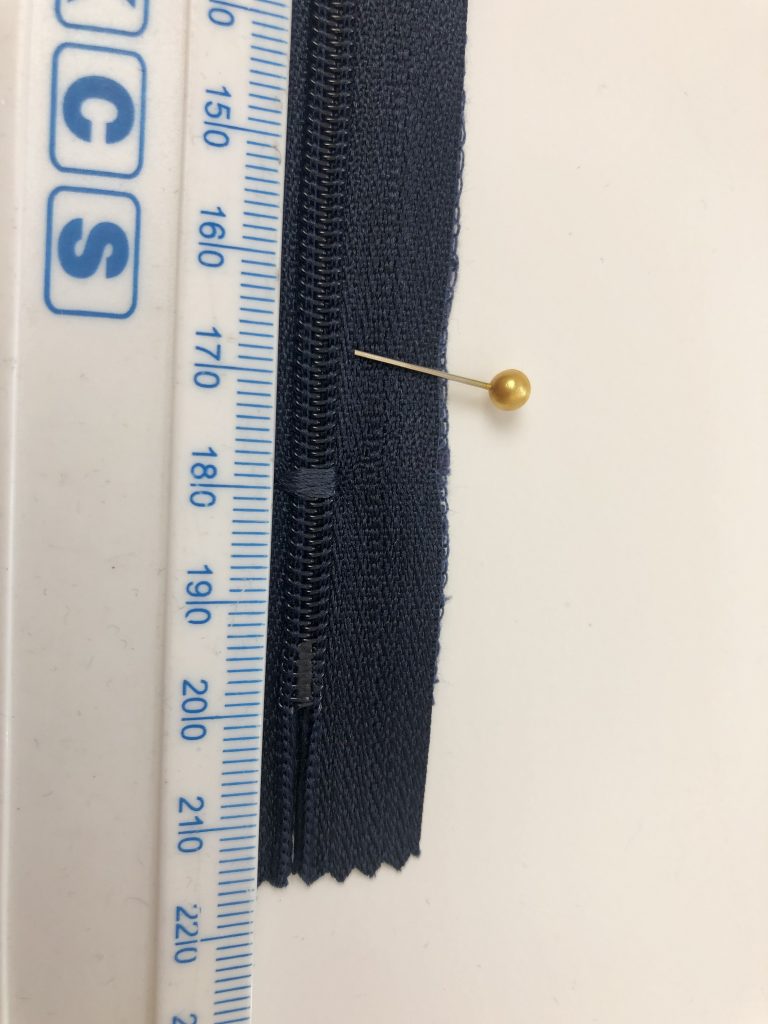
When attaching the zip to the zip guard, align the bottom zip stopper with the notch on the zip guard. I had 5mm of zip tape overhanging the top edge of the zip guard.
My new zip stop corresponds to where the notch is on the side of the zip guard pattern. It’s not so easy to see since the fabric is dark blue and the thread is an excellent match!

The pattern instructions are detailed and easy to follow but it would be helpful to have additional notches to correctly overlap the left and right at the centre front when finishing the zip. Maybe I missed something here but I just guessed this bit.
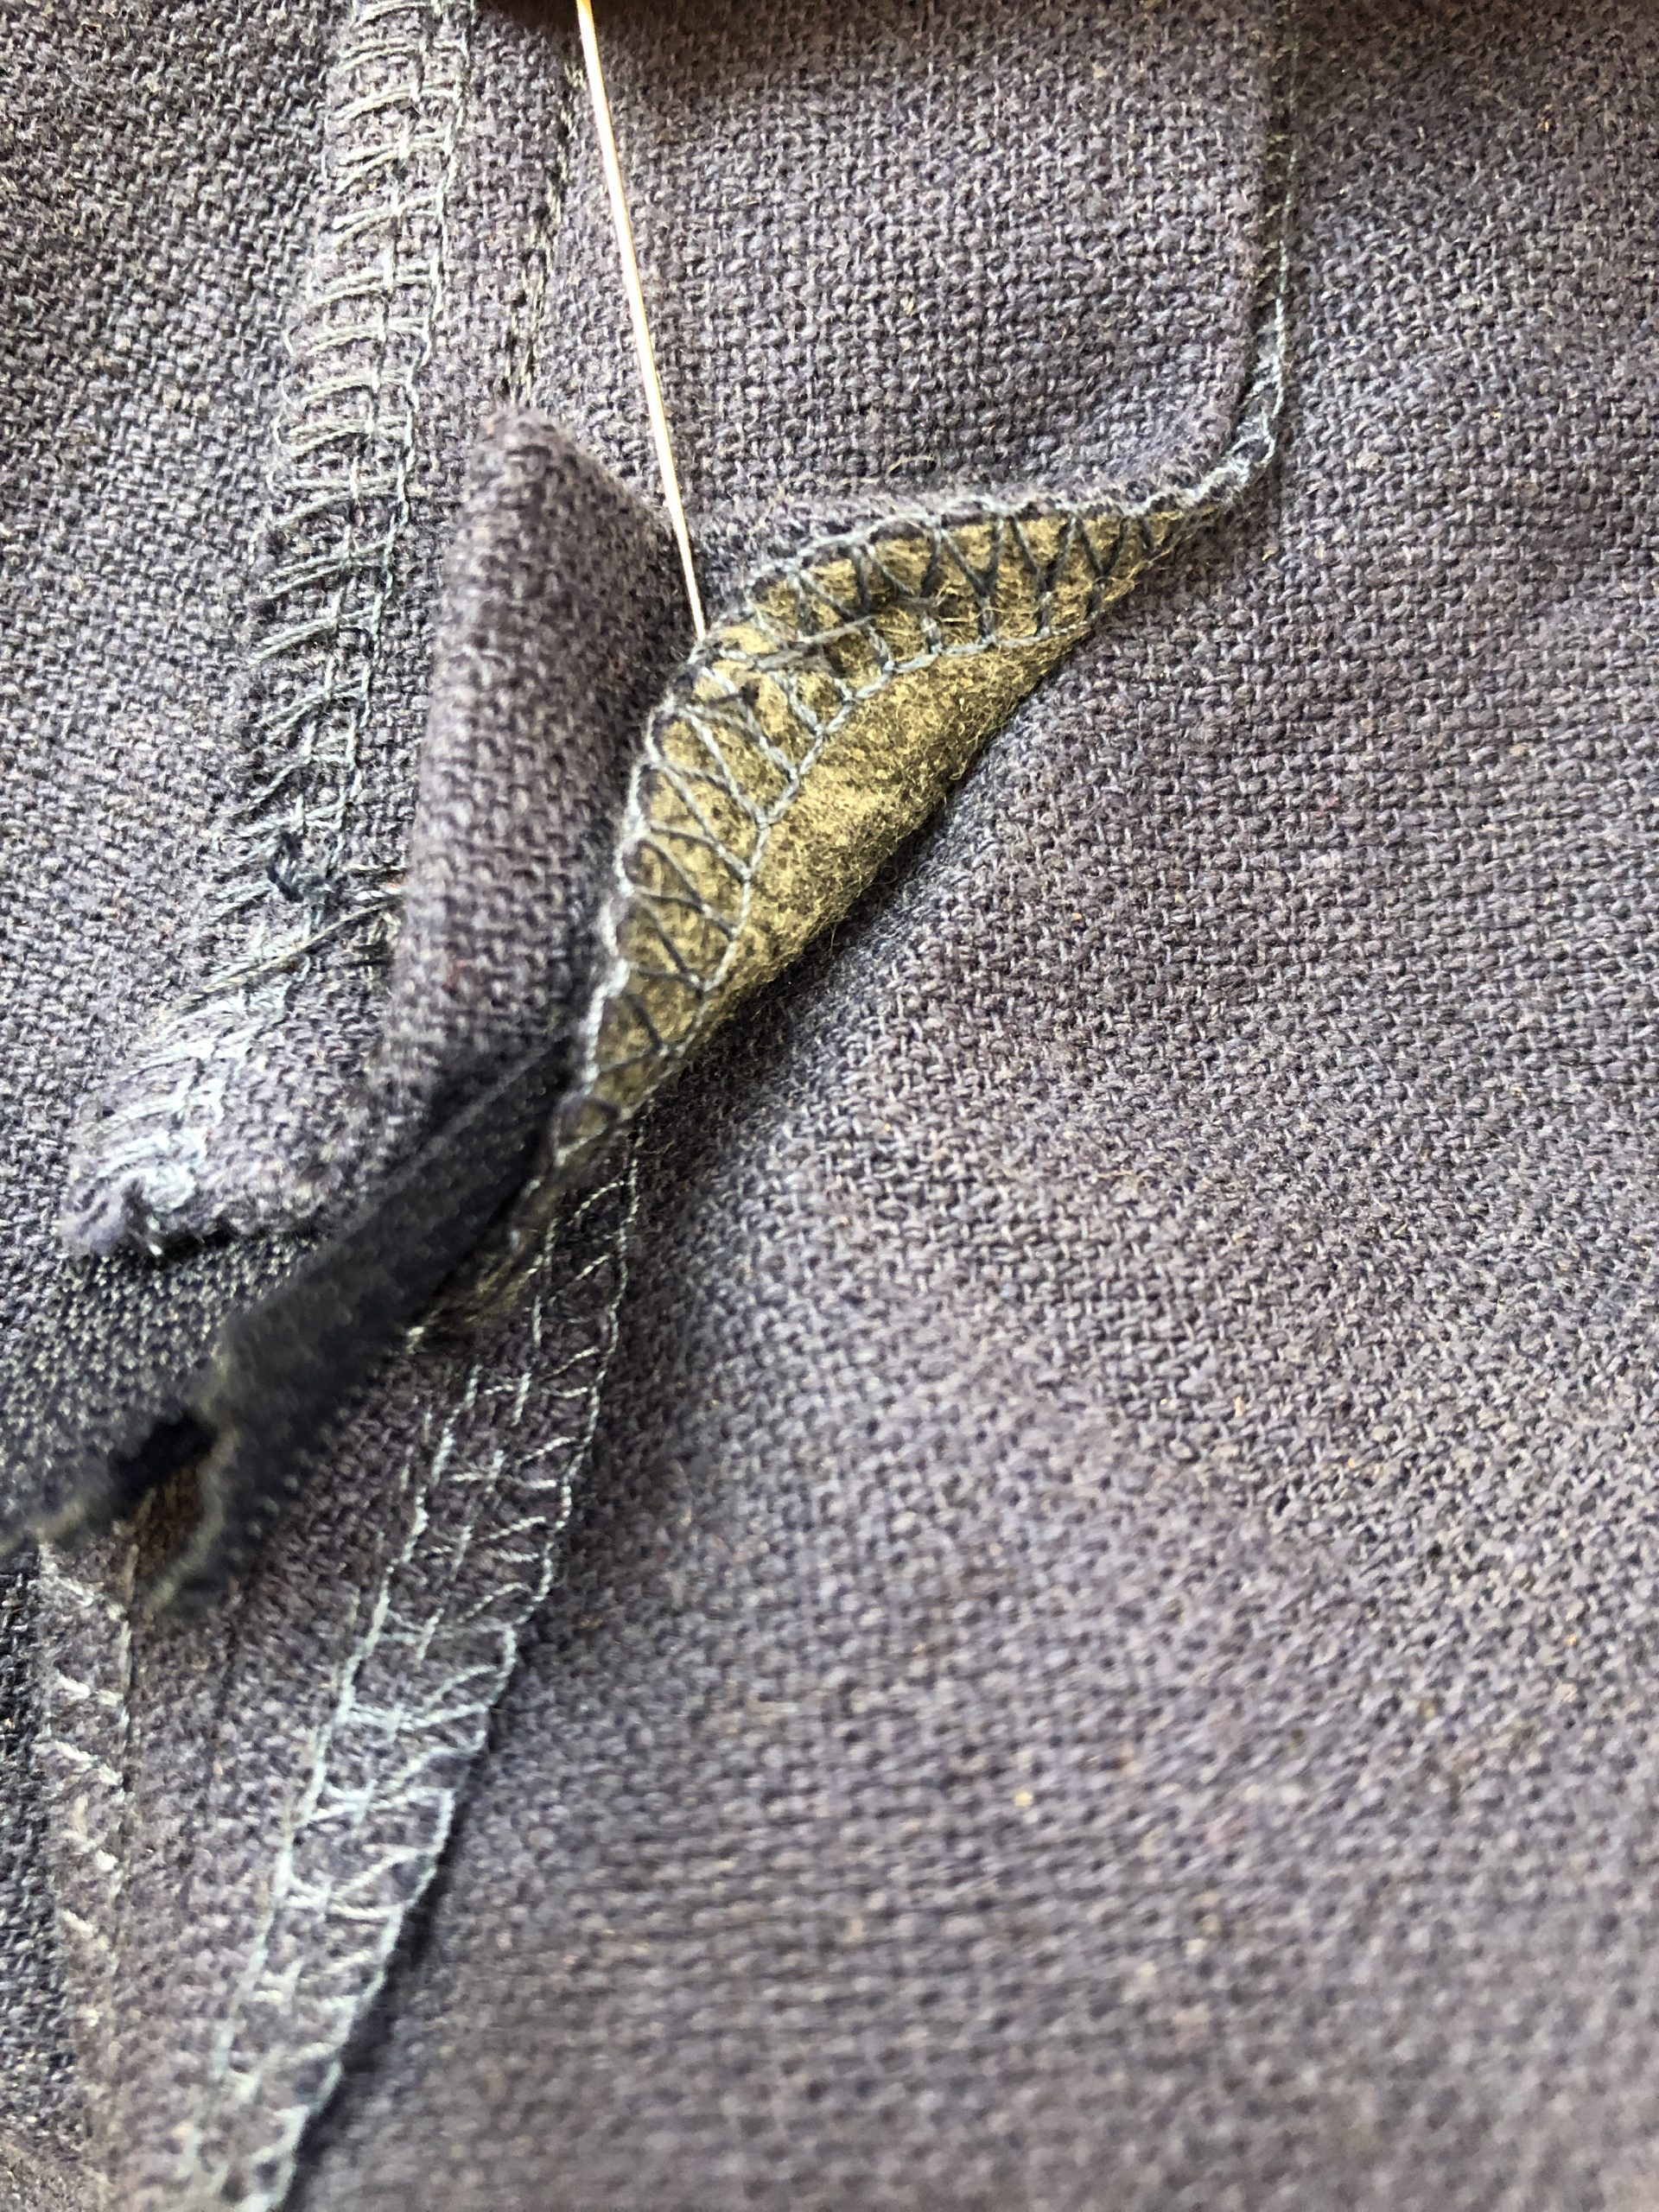
There is also no instruction for sewing the zip guard to the fly zip and I like these to be joined at the bottom to stop the zip guard from flapping to the wrong side.
After sewing the fly facing to the front of the trousers to create the visible line of stitching around the fly section, I held the zip guard and the fly together and added a few hand stitches to hold them together.
After stitching the fly zip, the rest of the construction is pretty straight forward.
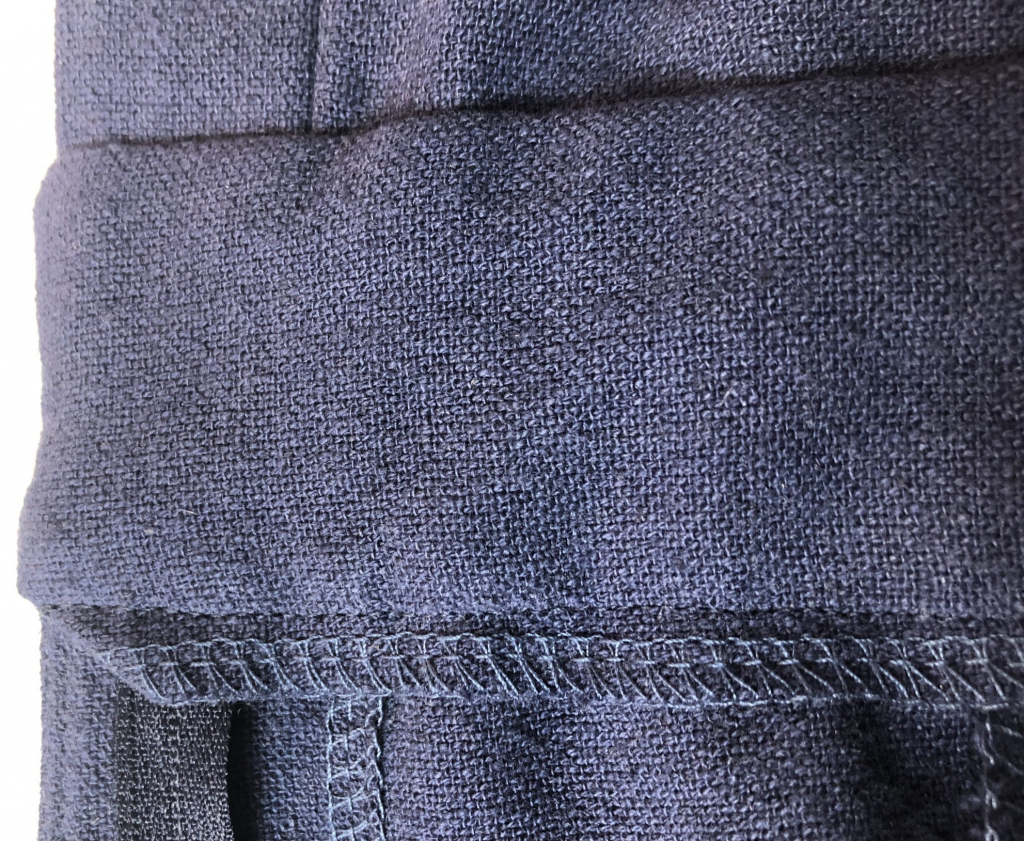
Attaching the waistband creates a lot of bulk around the centre front so I did a lot of seam trimming and layering so this would sit as flat and neat as possible. This picture shown the bulk before I did the trimming.
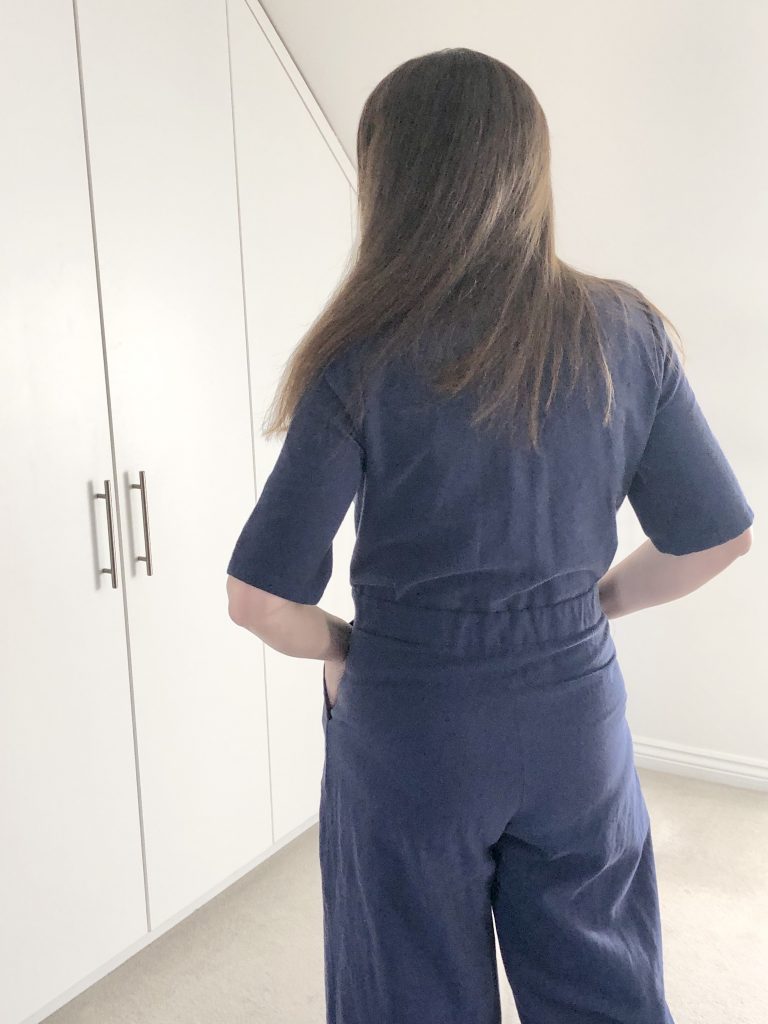
I decided to put some elastic in the back of the waistband to give a closer fit.
When stitching in the ditch to finish off the waistband I used the height compensation tool again to get my stitching started since it’s a bit bulky here at the beginning of the stitching.
I also used my blind hemming foot to help to keep a straight line in the ditch.
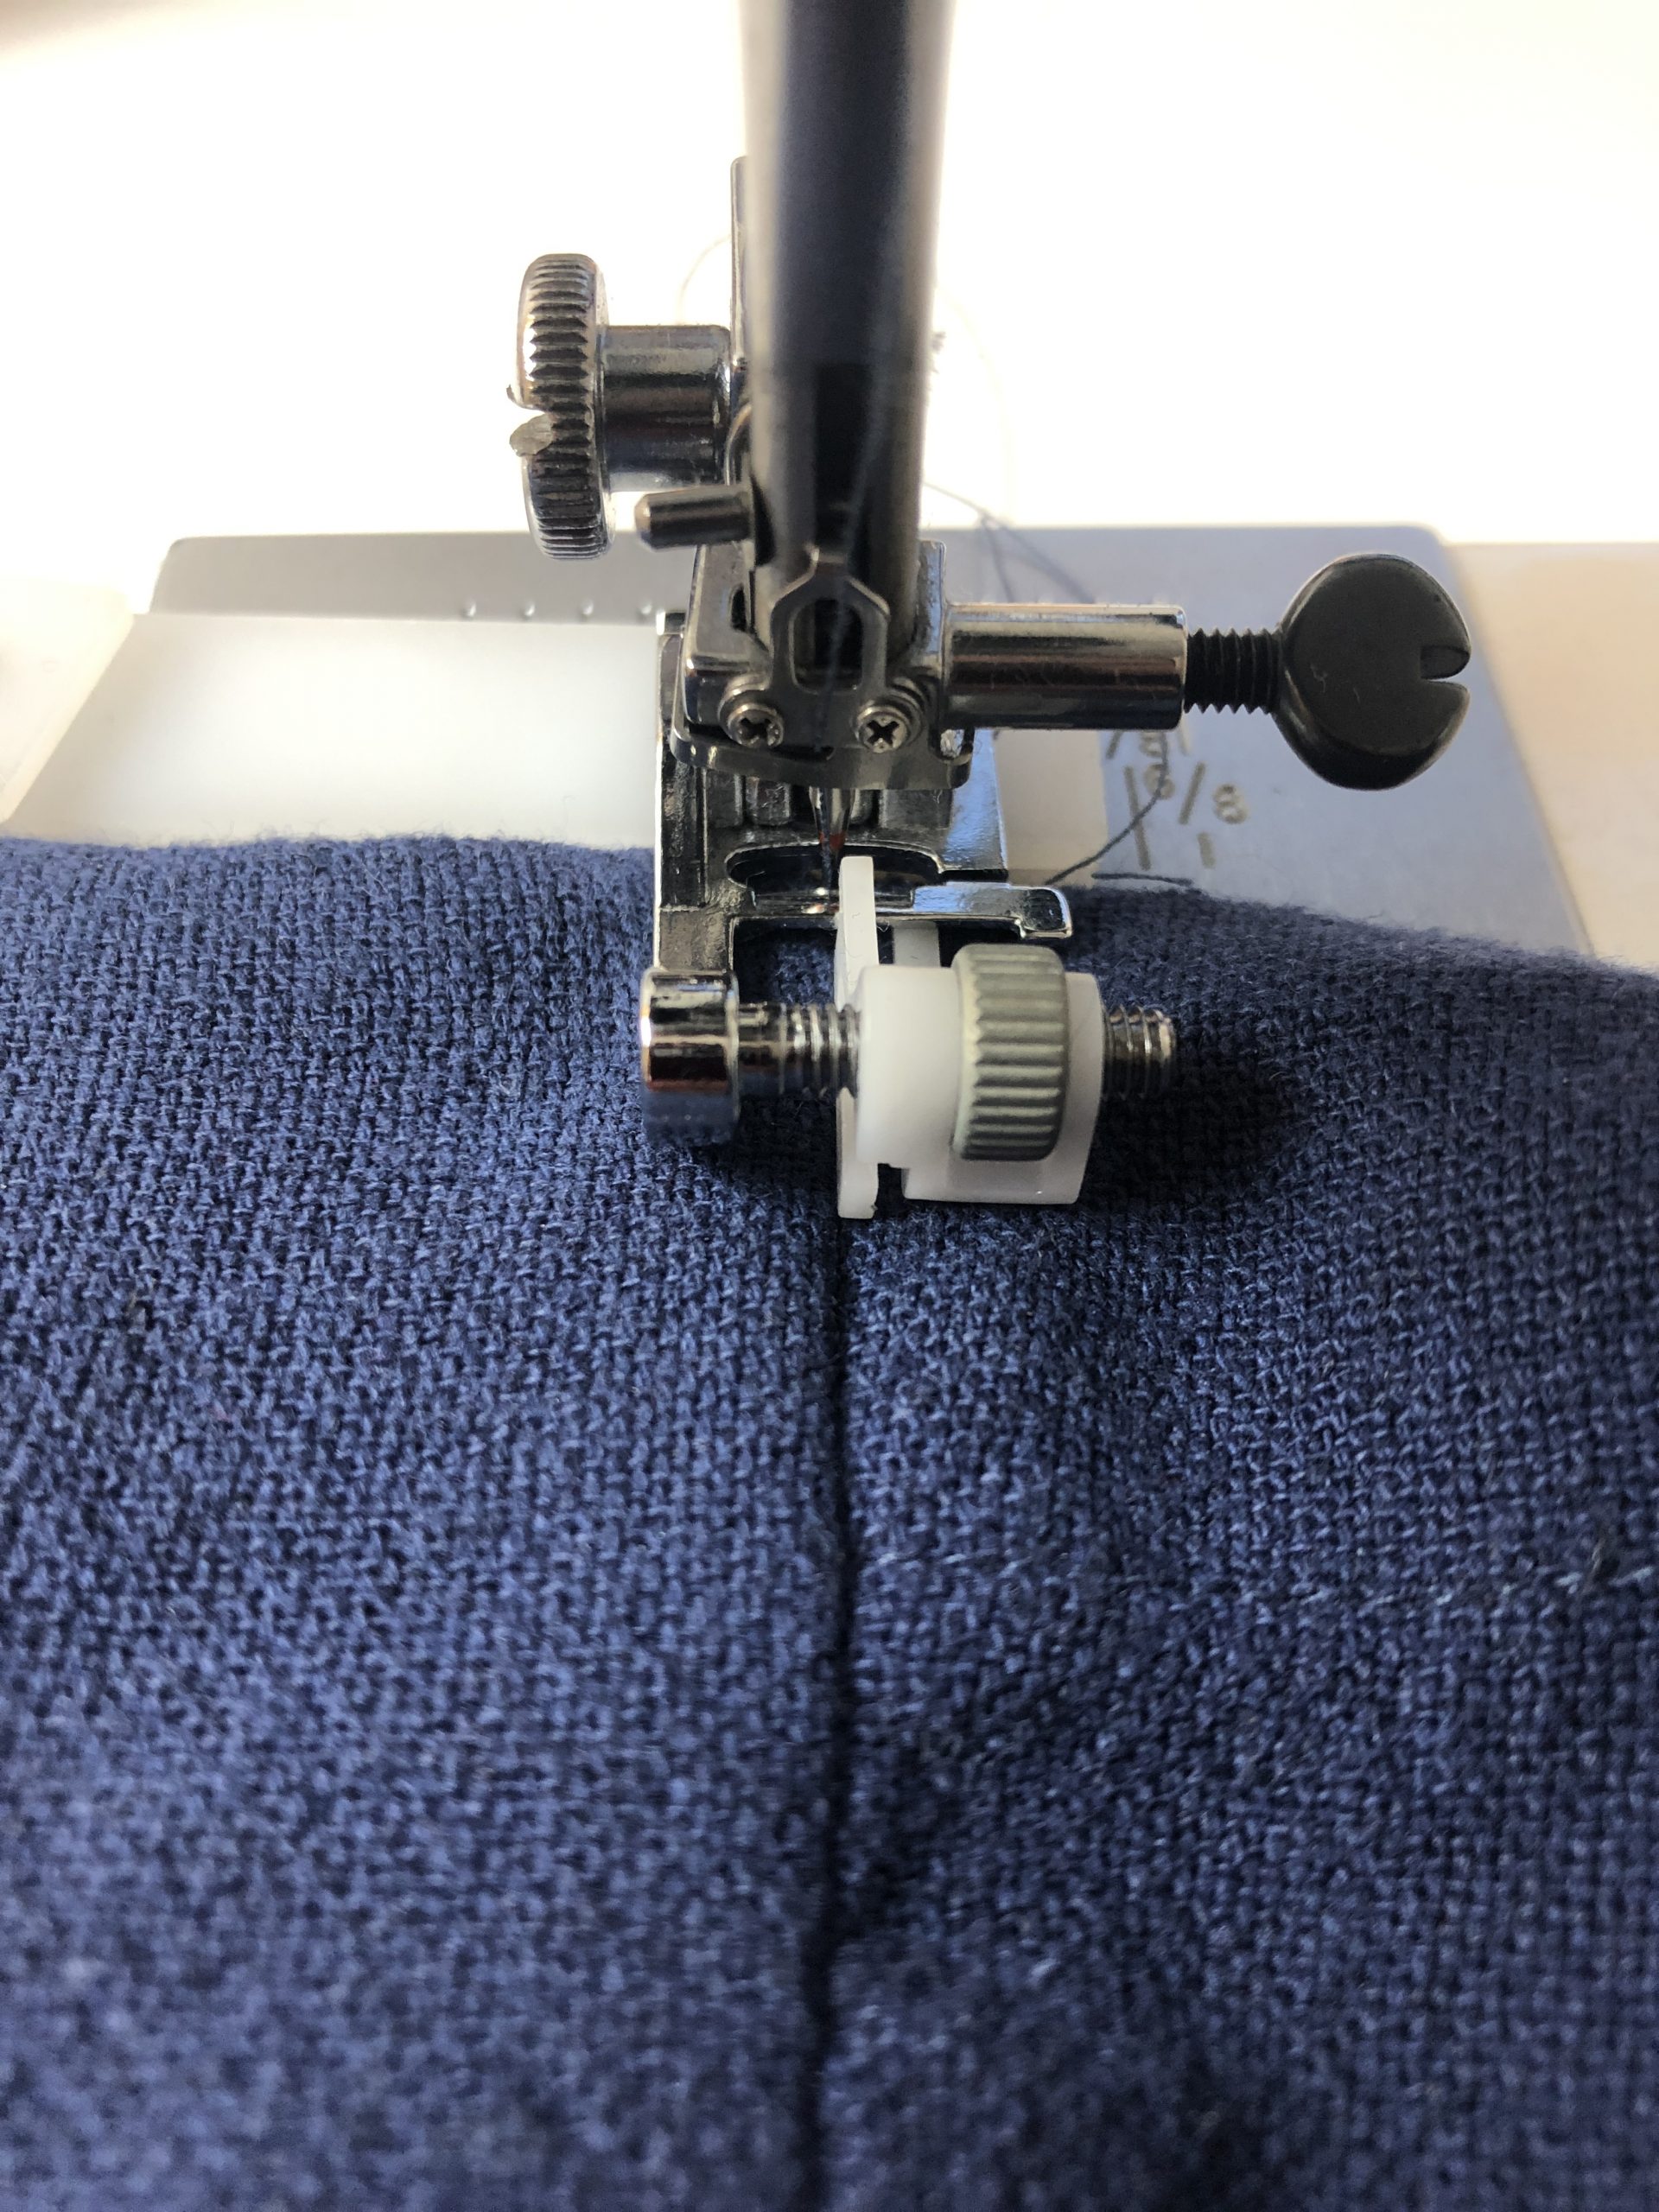
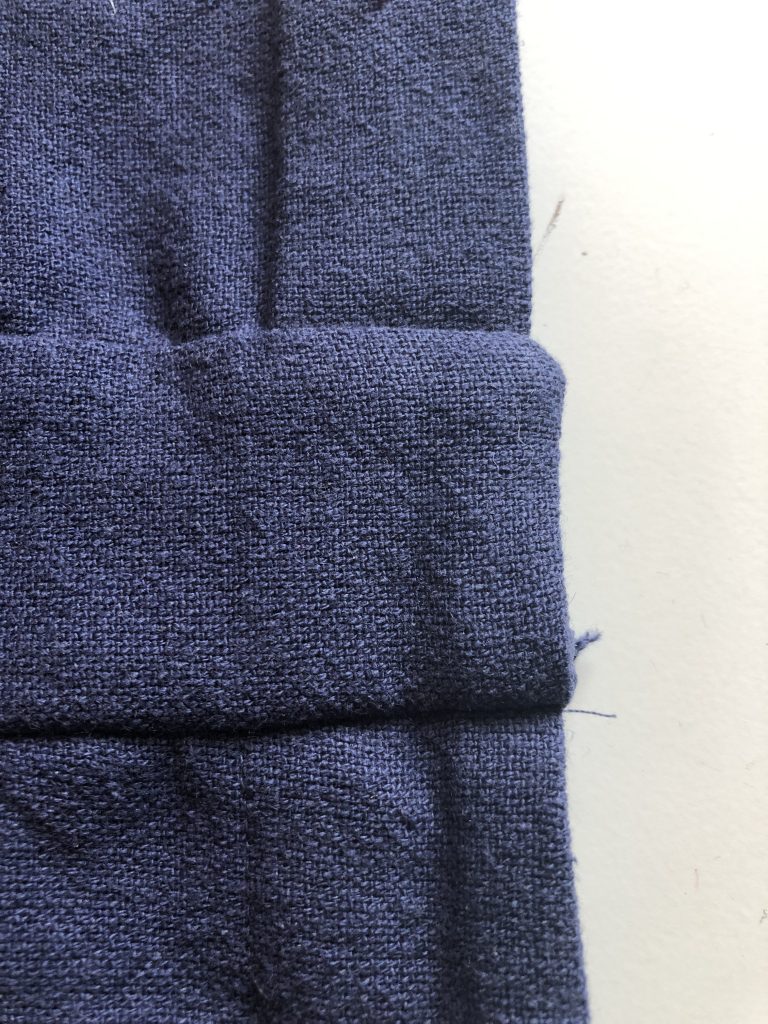
I turned in the very edge of the waistband before stitching in the ditch to give a neat front edge.
I marked the placement of the buttons with pins.
The buttons should sit about 3mm from the top of each buttonhole.
If you position the button in the centre of the buttonhole, when the buttons are done up, the front will slip down until the button rests at the top of the buttonhole. This results in the front edges being misaligned.
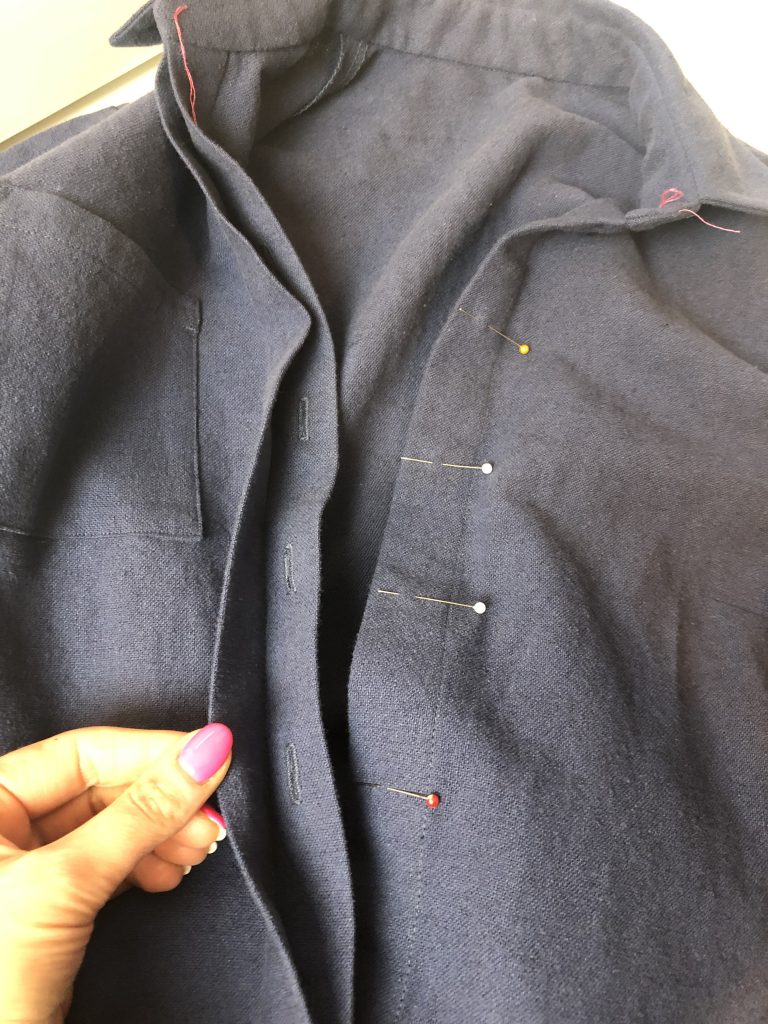
you can see how I mark the button placements in my video ‘How to Sew a Buttoned Shirt’ – please note this is a man’s shirt so the front laps left over right.
This video also shows how I sew on the buttons to create a thread shank, creating space between the button and the fabric to allow for the extra layer of fabric once the buttons are fastened.
You can see the button placement at 01:12:34.
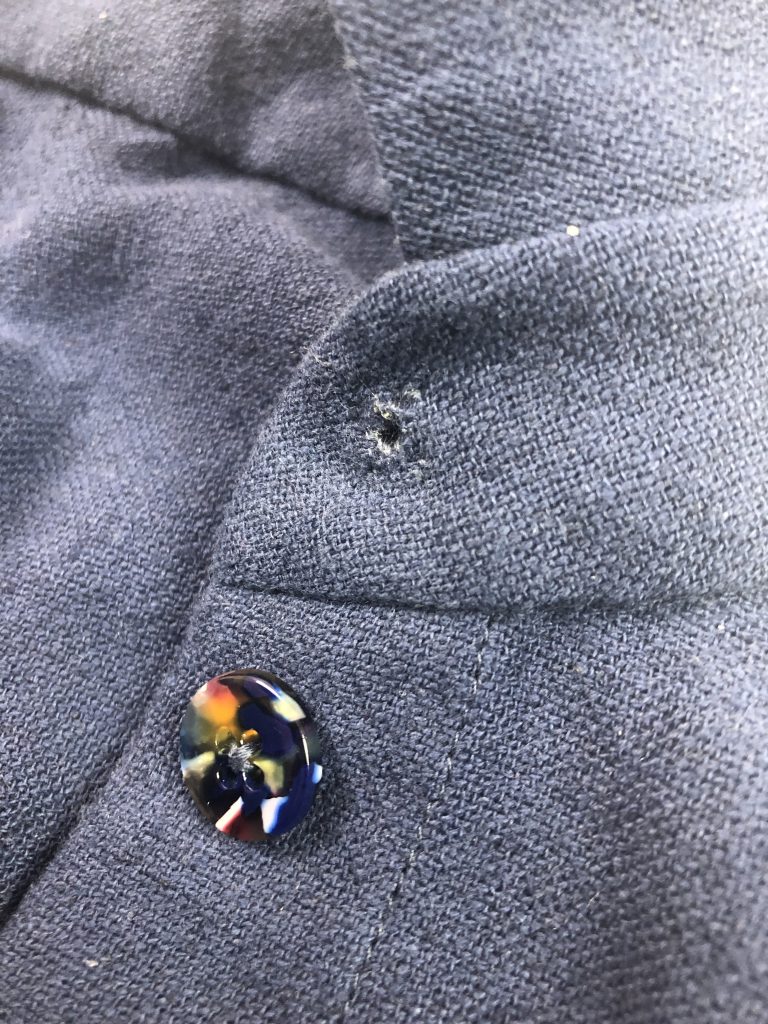
I used these beautiful 15mm buttons from Pigeon Wishes that Fabric Godmother has in stock. I don’t think my photo really does them justice!
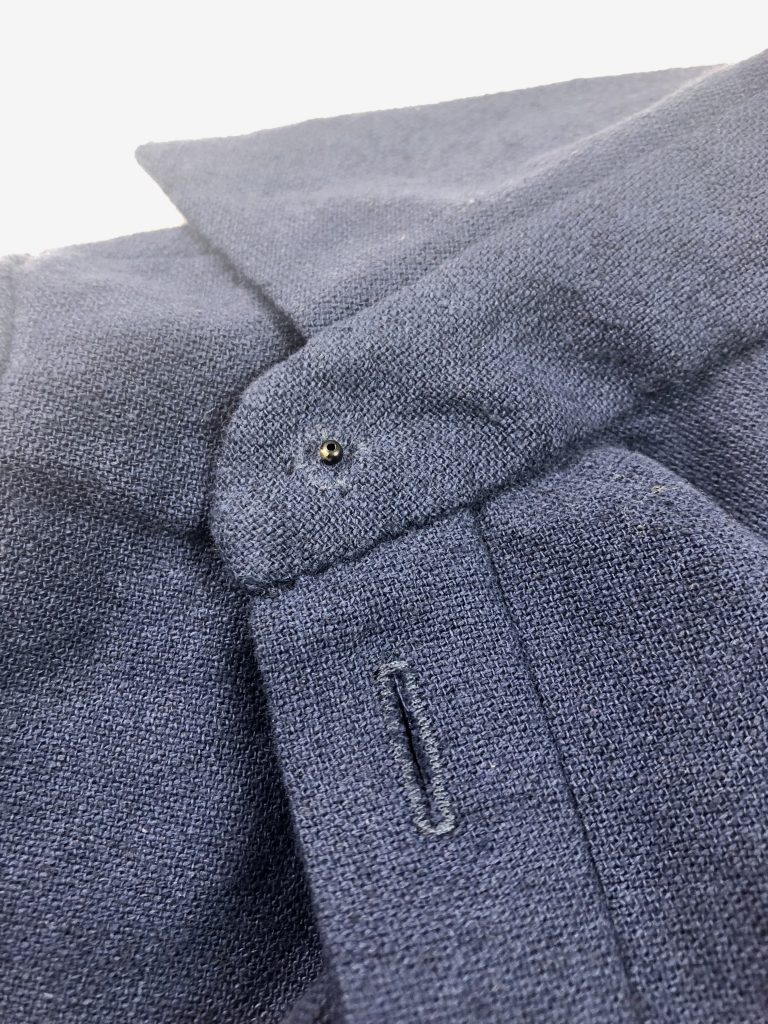
As I’d added the fly front to the buttonstand I didn’t want to have a visible top button on the collar stand…it seems to defeat the purpose of concealing all the other buttons.
I opted for snap fasteners and covered them using this tutorial by Thread Magazine.
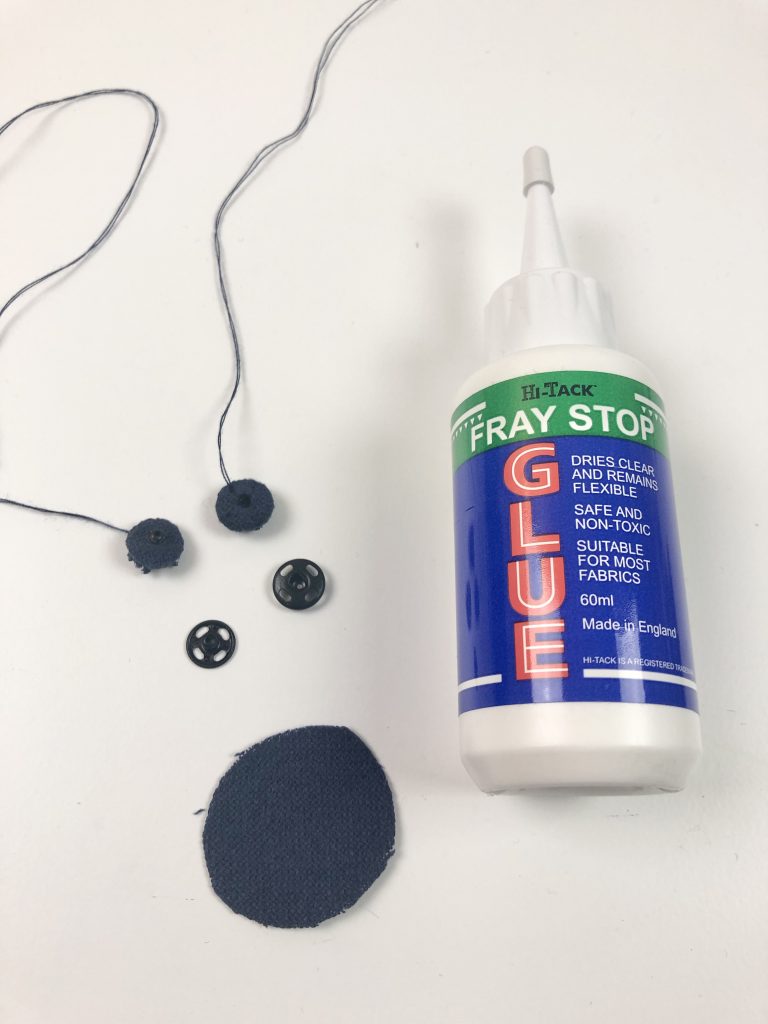
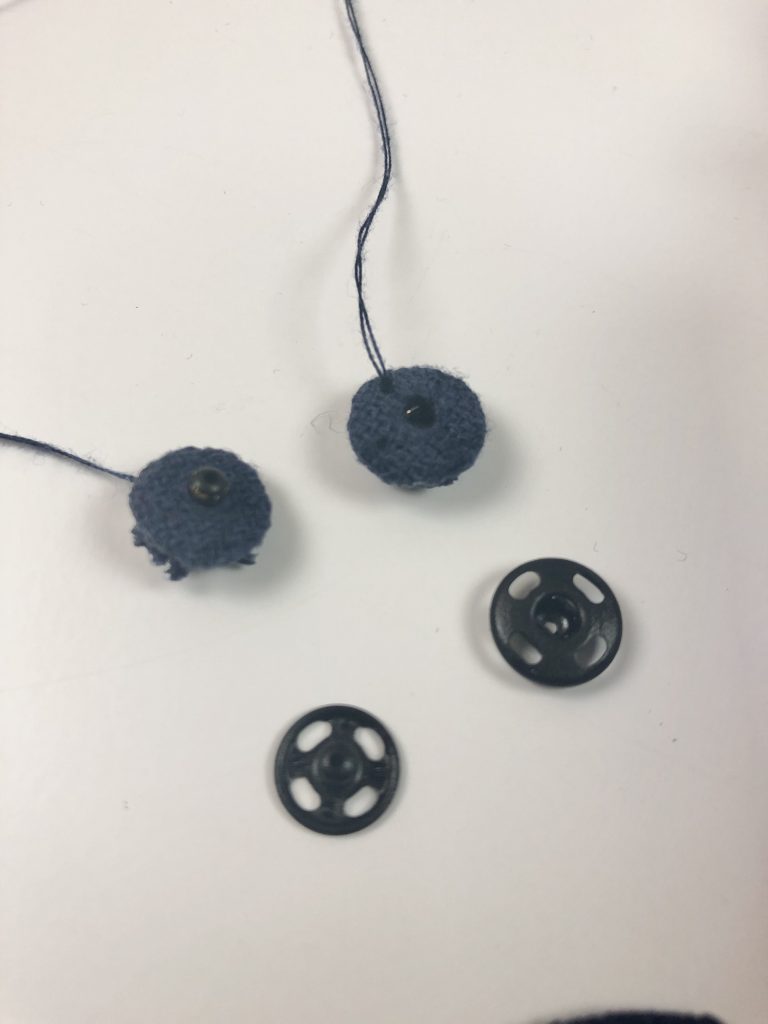
But I wasn’t that happy with the result so I decided to use a similar method to install the snaps into the collar stand.
It was quite easy to create a hole in this fabric without cutting anything. I used a thick yarn needle to work a hole in the inside collar stand, above the buttonholes. I then pushed the ball part of the fastener through and worked tiny stitches to hold it in place, making sure that stitches weren’t visible on the right side.
For the socket part of the fastener I made a hole in the corresponding place on the right side of the collar stand, above the buttons. I placed the socket behind the hole and again made tiny stitches to hold it in place. The stitching on this side is a little more visible on the inside of the collar stand but that’s ok as no one will see it.
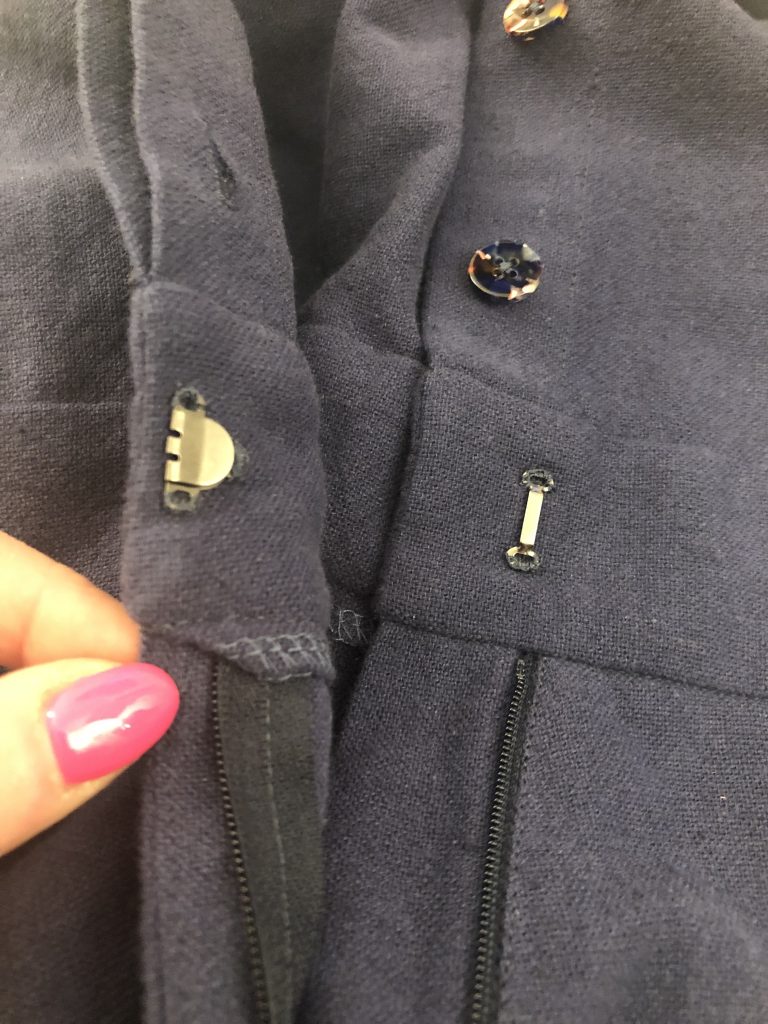
On the waistband I added a hook and bar. This fastening sits in the centre of the waistband, close to the edge.
I always add the hook first to position this correctly and then position the bar.
The bar part of the fastening is almost in line with the zip.
I used a blanket stitch to sew these in place.
I’m really pleased with how this has turned out.
The pattern came together brilliantly and the instructions were really easy to follow, with plenty of details, even if I decided to go a bit off piste now and then.
I’m definitely going to be making another one of these but I think I’ll add another 1cm to the bodice or the top of the trousers for a little extra ease.


2 thoughts on “The Lennox Boilersuit”
Pingback: Adding a Fly Front or Concealed Buttonstand - Julia Hincks | House of Miss Sew
Pingback: Pattern Review – Filippa Shirt Dress by Fibre Mood - Julia Hincks | House of Miss Sew
Comments are closed.